Caulk and Sealant Selection and Use – Editorial: The Big Three, Essential Tasks Every Cruisers Needs to Know How to Perform
Text and photos copyright © 2018 Steve D’Antonio Marine Consulting, Inc.
From the Masthead
The Big Three
Don’t wait. That’s been my advice to vessel owners and skippers for years; don’t wait until things break to fix or service them. Instead, practice condition-based or predictive maintenance.
A few weeks ago, a propulsion engine aboard a vessel I was sea trialing overheated, the result of a failed raw water pump impeller (number one). The owner reported it had last been replaced in 2016. This is an all too common occurrence; for the cost of the impeller, and the potential damage caused by overheating, or loss of power, this approach represents false economy. Raw water pump impellers on both propulsion engines and generators should be replaced annually. In addition to virtually eliminating the possibility of an impeller failure, this sort of regular access to the pump ensures that impellers won’t seize to the drive shaft, it allows users to inspect cams and cover plates for wear, and it’s good practice in the event this task needs to be carried out in haste, i.e. if a replacement becomes necessary while on a lee shore, transiting an inlet, canal or the Intracoastal Waterway.
The lifespan of an engine drive belt is finite (number two). It, or they, should be carefully inspected regularly, at least weekly for those running every day, and before getting underway for less frequent users. Replacement should, like impellers, be carried out annually; or no more than every two years for less frequent use. Doing so keeps you in practice, and it allows you to check the condition of idler pulleys and tensioners for serpentine belt systems (they should spin freely and in the case of the tensioner, remain in plane with other pulleys). Belt guards are now ubiquitous, that’s a good thing, however, some completely hide belts and are tedious to remove, thereby discouraging belt inspection. It’s a gripe I’ve shared with a few engine manufacturers. Hint, keep the old belt as a spare, you know it fits (I can’t tell you how many times I’ve encountered spare belts that did not fit); each time you replace the belt remember to turn over the stock spare.
The final predicative maintenance item is fuel filtration (number three). I prefer to use the condition-based maintenance approach where this component is concerned; that is, replacing filters based on how much dirt they have captured. The only way to do this, for primary diesel fuel filters, is with the use of a vacuum gauge. As long as the gauge stays in the green, there’s no pressing need to replace the filter element. If the gauge moves into the yellow or red zone, of course it must be replaced. If this occurs before having consumed 1,000 gallons of fuel, there’s a strong possibility of fuel tank contamination. High quality vacuum gauges can be obtained here
For further reading on these subjects visit…
Finally, the SDMC website search engine has been improved. You can now easily search the website for hundreds of articles, photo essays, letters and columns. Scroll down about one-third of the way on the home page and you’ll see, in the right margin, a box that says “Google Custom” along with a magnifying glass. Type your search subject here and you’ll get quick, accurate results. The first three or four results are ads (there’s no free lunch in the cyber world), however, below those you’ll see the real SDMC website links.
This month’s eMagazine feature article covers the subject of selecting and using sealant and caulk. I hope you find it both interesting and useful.
Caulk and Sealant Selection and Use
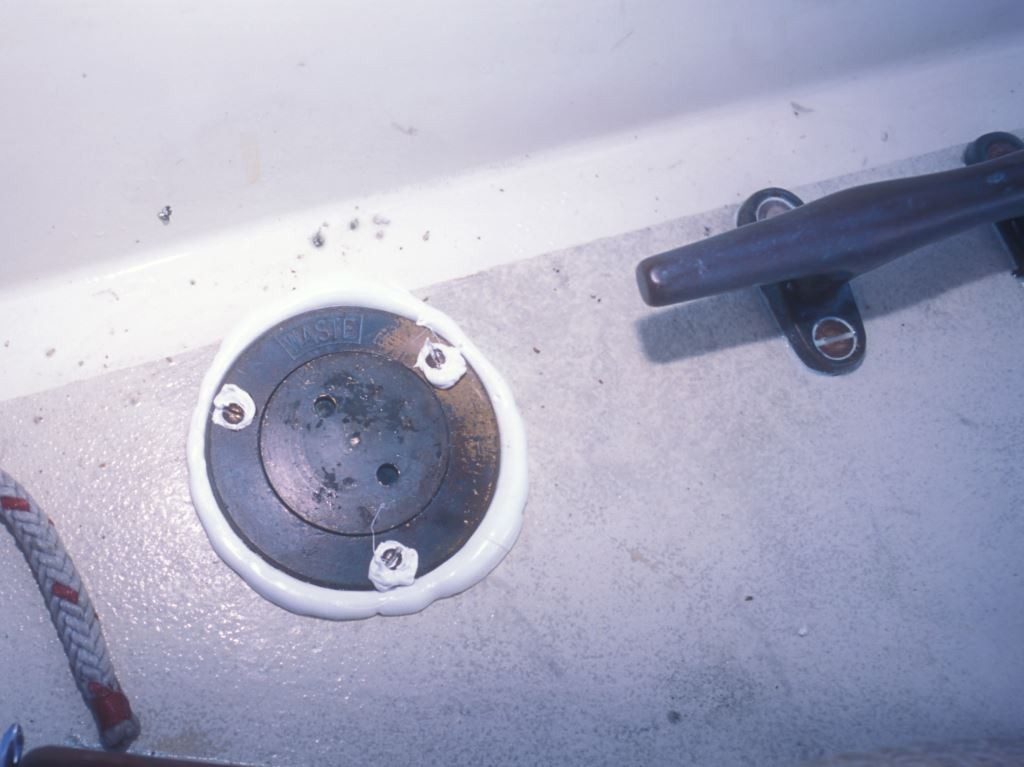
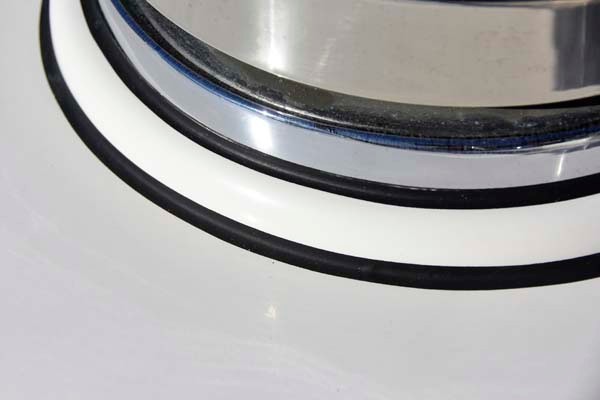
While a bit messy, ample ‘squeeze out’ is an important step in proper bedding, both ensuring a good seal as well as preventing water from migrating under hardware, where it can lead to corrosion, staining or water entry into cored substrates.
“How long can bedding be expected to last?” It’s a question that I hear often, and one for which there is, unfortunately, no hard and fast answer. In most cases it comes after a leak, often from deck hardware, has manifested itself. Regrettably, there are simply too many variables to provide one fixed response, including the quality of the sealant, and its correct selection, the size of the gaps it’s filling, their relative movement, temperature changes and climate, and perhaps most importantly, the level of effort expended on surface preparation and installation technique.
Sealant/Adhesive Selection
While there are many others, marine adhesive/sealants, more on the distinction in a minute, fall primarily into two categories, polyurethane, and polysulfide, with each embodying its own strengths. Polyurethane (PU) is the most popular, thanks to the early success of 3M’s ubiquitous (some would say too much so) 5200, which originally proved to be an effective sealant for timber vessel planking, and now countless other uses. Today, there are a dizzying range of types and manufacturers, offering a variety of features including UV resistance, quick cure and reduced adhesion.

Exposed sealant beads or fillets must utilize material that is UV resistant; ideally it should also resist mold. Because polyurethane caulk typically does not bond to stainless steel over the long term, the surface to which it’s applied should be abraded to improve adhesion.
Because of its high tensile or peel strength (it has a high ‘Shore A’ or hardness rating, and low elongation), PU is considered both an adhesive or bonding agent as well as a bedding compound or sealant, in other words it helps hold things together as well as forming a barrier to water. In fact it cures when exposed to water (and even underwater), including atmospheric humidity, to a tenacious rubbery consistency. I’ve had cases of 8,000 pound ballast keels remaining steadfastly stuck to fiberglass keel stubs after keel fasteners were removed, solely by virtue of PU adhesive’s qualities. Where the higher tensile strength versions are concerned, it should be used with extreme caution as non-destructive disassembly may be impossible. This semi-permanent approach works well for gear that isn’t routinely removed, in which sealing as well as adhesion are welcomed, such as seacocks, struts, keels, hull to deck joints etc, however, it can prove problematic if used on less permanent components like antennas, non-metallic port frames, compasses or other gear. There was a time when 3M 5200 was used for every bedding/sealing application, from deck lights to VHF radio installations. The folly of that approach eventually became apparent; today professional installers are, for the most part, more savvy about sealant/adhesive selection.
Silicone sealant has many attributes, however, paint compatibility isn’t one of them. Even years after its application it still repels water.
Heat, from a heat gun or torch, will overcome PU’s adhesion, provided it can be applied safely, something that’s relatively easy for metallic components such as a through hull fitting or strut for instance, but clearly not for plastic or fiberglass. Unless the manufacturer specifies otherwise, most PU is not resistant to UV light (or mold for that matter). Therefore, if it’s used in an exposed or open-bead scenario it may degrade, or develop mold unless UV/mold inhibited. It can be painted, however, since it is flexible, paint applied over it will often crack with movement, temperature change or if pressed or pushed on. Therefore, I consider it undesirable to apply two part paints over PU beads. It’s suitable for above or below the waterline applications; the original formula can take up to two days to become tack free, and five days for full cure, depending upon temperature and relative humidity, during which time it may attract dust, pollen and debris. If it’s exposed, where cosmetics are important, covering it (without making contact) with masking paper or plastic may be necessary until it cures.

The lifespan of caulk is finite, and even more so in the case of exposed weather deck beads
Polyurethane (PU) caulks are so versatile, so readily available and so widely accepted and used, they have in many cases eclipsed alternatives. That’s unfortunate because as good as PU caulk is, there are times when other formulations may be preferable, and the two that come to mind are polysulfide (PS), and silicone.
PS has a number of attributes, which include resistance to UV light, fuel and many deck and other cleansers, as well the ability to be sanded and painted. Above all these, however, is its ability to remain flexible for years. Unlike PU it doesn’t dry to a hard, eraser-like consistency. It is, therefore, ideally suited to applications where it is exposed to flexing or movement, UV light, deck/teak cleaners and fuel, and where disassembly, or exposure to certain chemicals including fuel, is anticipated, like antenna bases, search lights and fuel fill fittings.

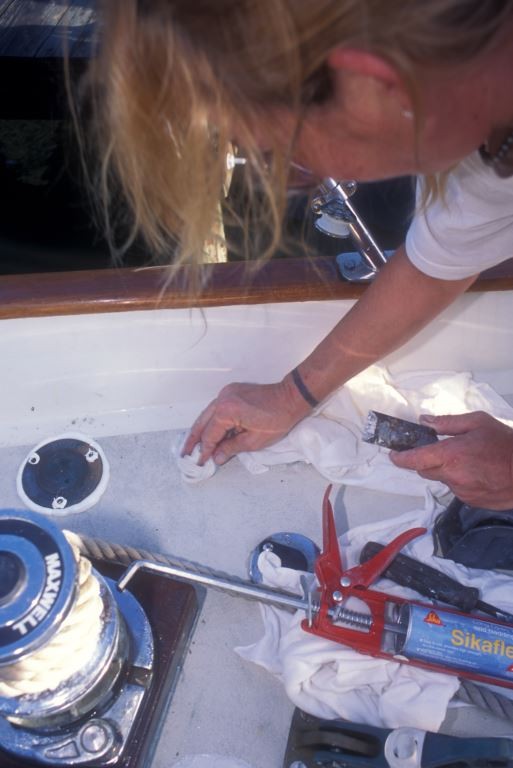
Neat, attractive sealant bead or fillet applications can be achieved using a concrete shaping tool, as well as masking tape.
I’d go further than this, however, in my praise for PS and suggest that it is an unsung hero among marine sealant; it’s simply been orphaned without just cause by PU. For years 3M offered PS sealant in a product known as 101, however, it was discontinued a few years ago (I still husband a small supply, which I keep in my shop refrigerator, caulk should be kept cool for the longest shelf life), I’m told because it simply no longer sold. Thankfully it remains available from other manufacturers, including BoatLife.
Caulk is often available in different colors. In this case gray silicone has been chosen, where a bead will be visible after assembly, to match the stainless steel port spigot and trim ring.
When making a decision as to whether you should use PU or PS, ask yourself these questions, ‘Will I, or someone, need to disassemble it?’ and, ‘Do I need an adhesive?’ If the answer is, “I might”, and “no” respectively, then consider PS. Make no mistake about it, PU remains very well suited for permanent and pseudo-permanent installations such as hull to deck joints, metallic through hull fittings, struts and external keel attachment (it can be attacked by teak cleaners). There is one caveat where PS (and in some cases PU) sealant is concerned; while not universal, it can be harmful to certain plastics including ABS, PVC, acrylic (commonly known as Plexiglas) and polycarbonate (also known as Lexan), while Nylon and Delrin, including reinforced plastics from which ABYC-compliant through hull fittings and seacocks are made, are generally unaffected. Needless to say, read the directions before using either PS or PU sealant on any plastic.
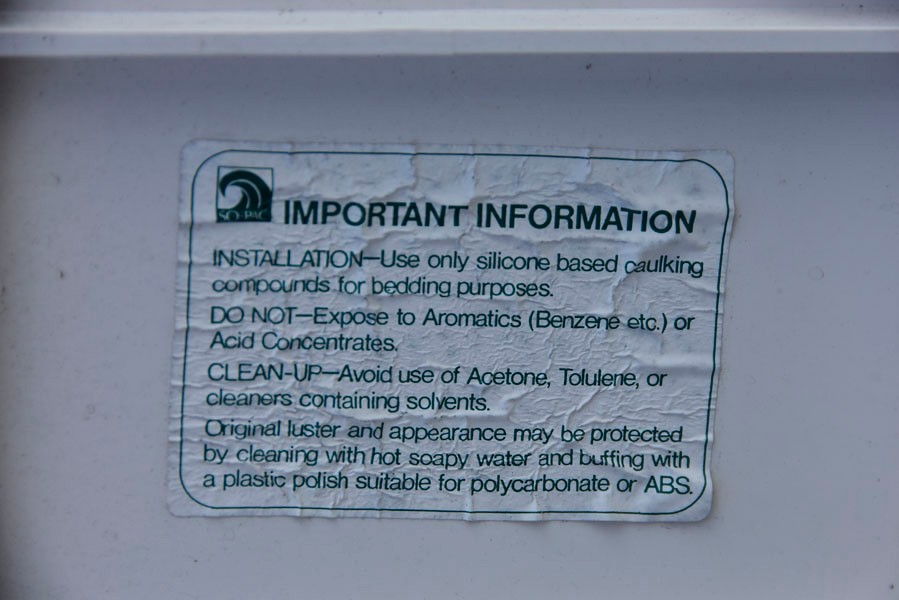
Manufacturers of some plastic hatches and ports clearly call for the use of silicone rather than polyurethane, while prohibiting the use of harsh solvents such as acetone
Silicone has a less than enviable reputation in the marine industry, and that too is somewhat undeserved. Several years ago I faced a vexing problem with deck hatch leaks aboard vessels over which I was supervising construction. Regardless of the sealant used, or meticulousness of the preparation, leaks always and inexplicably appeared within a few months. I figured I had nothing to lose by trying an industrial silicone sealant manufactured by GE called Silpruf. Voila, no more leaks, and I was sold thereafter.

Silicone is a viable option and well-suited for above the waterline caulking applications. Some plastics, such as those used for circular inspection ports, prohibit the use of polyurethane and polysulfide, making silicone a natural alternative.
Like all sealant there are pros and cons. In the case of silicone, while it’s safe for use on plastics, it lacks the durability for below the waterline use and, this is where it gets its unenviable reputation, it cannot be painted, which means any residue left behind will drive painters and varnishers crazy by producing the dreaded ‘fish eyes’, oval defects in coatings that are repelled by silicone. How long does the contamination last, you ask? About five years ago I re-bedded a cyclops light on the back of one of my non-garaged cars using silicone, and to this day water beads in the area around the lens. Therefore, if you opt to use silicone, you must be especially careful about contamination, especially near areas that are, or may be, painted or varnished.
Preparation
Where deck leaks are concerned, the finger is often pointed, unjustifiably as we’ll see, at the bedding compound itself. More often than not, and unlike the aforementioned chronic deck hatch leaks, the primary culprit in these cases is contamination; stainless steel, aluminum, bronze (and sometimes even plastic) hardware and fasteners are nearly always contaminated with cutting oil used in the manufacturing process, as well as wax used for polishing. Both of these contaminants work exceptionally well as release agents, preventing the all too necessary bond that must occur between these parts and the sealant. The same process is at work where gelcoat surfaces are concerned, they too can be contaminated with mold release wax, which allows parts to be separated from molds during the manufacturing process, as well as construction dust, where new vessels are concerned; or polishing wax for vessels already in service. Even oil from skin, fingers and palms, can contaminate sealing surfaces.
For both new vessels, as well as those that have been in service for some time, thoroughly cleaning the surfaces to which hardware will be bedded is among the most important steps in sealant application.
The solution to this problem is simple. The surfaces destined to be bedded must be thoroughly decontaminated, sometimes referred to as de-waxing. That process itself, however, is not intuitive. There’s more to it than simply wiping down parts with a solvent-soaked rag. The rags used for this process are themselves often contaminated with detergent and surfactants; the latter is a chemical that makes fabric more absorbent, or oil, grease and dust from a shop environment, or skin. Therefore, only clean cotton rags or shop paper towels should be used for this task. Regardless of whether you are using your own old T-shirts or pre-packaged bags of rags, rinse them in clean water, thereby removing these contaminants, and allow them to dry before use.
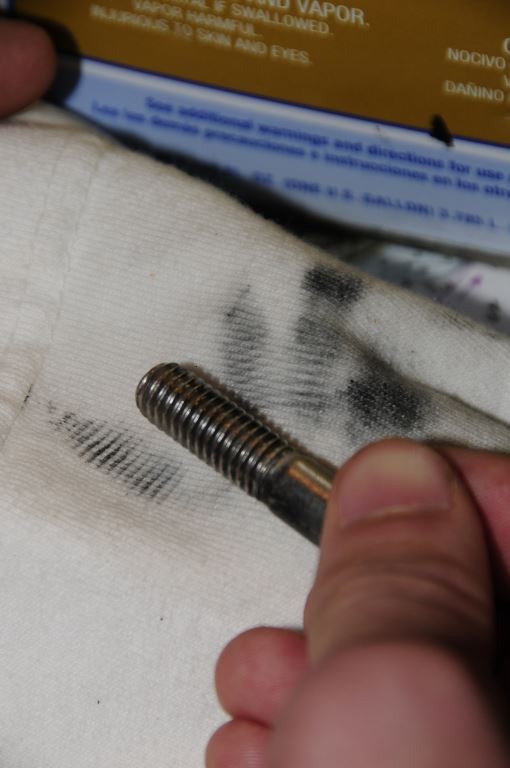
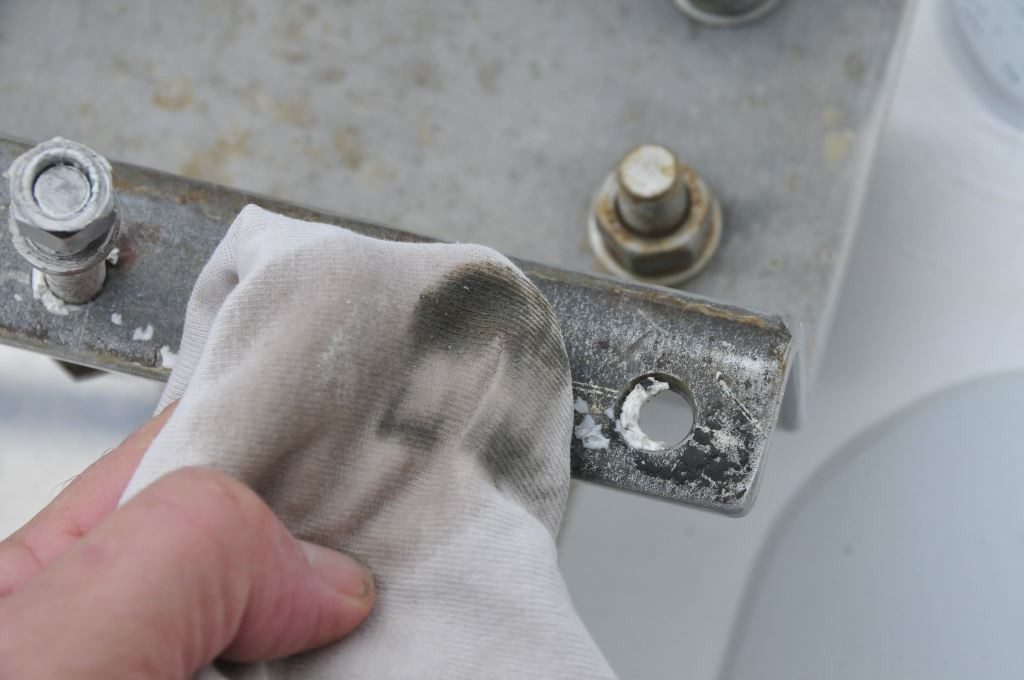
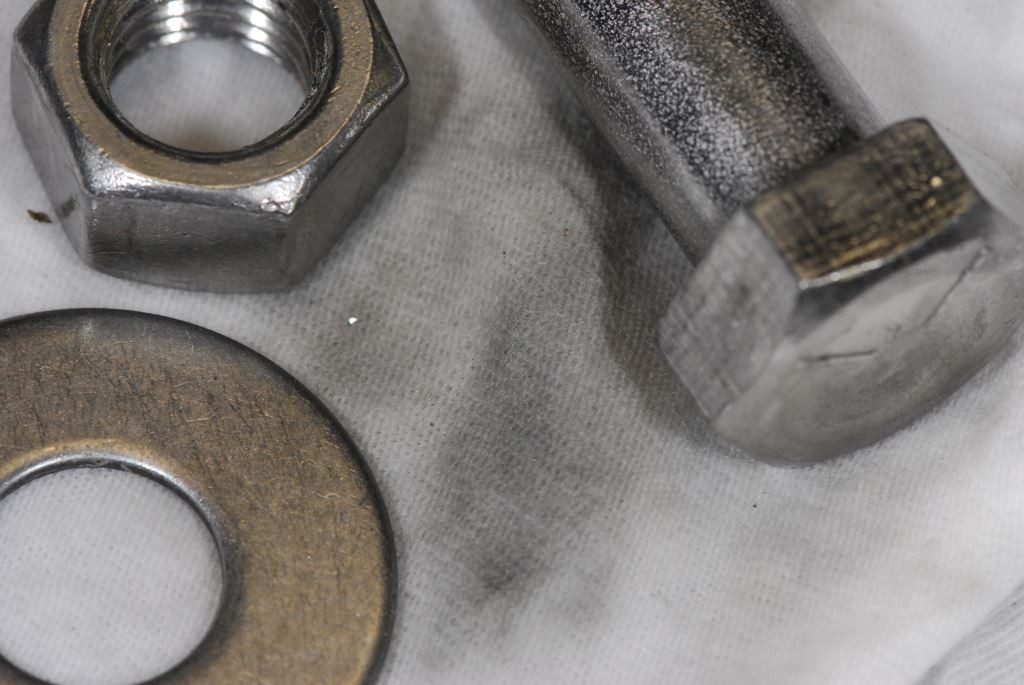
Hardware and fasteners are nearly always contaminated with wax or oil; all must be thoroughly cleaned or de-waxed before sealant is applied.
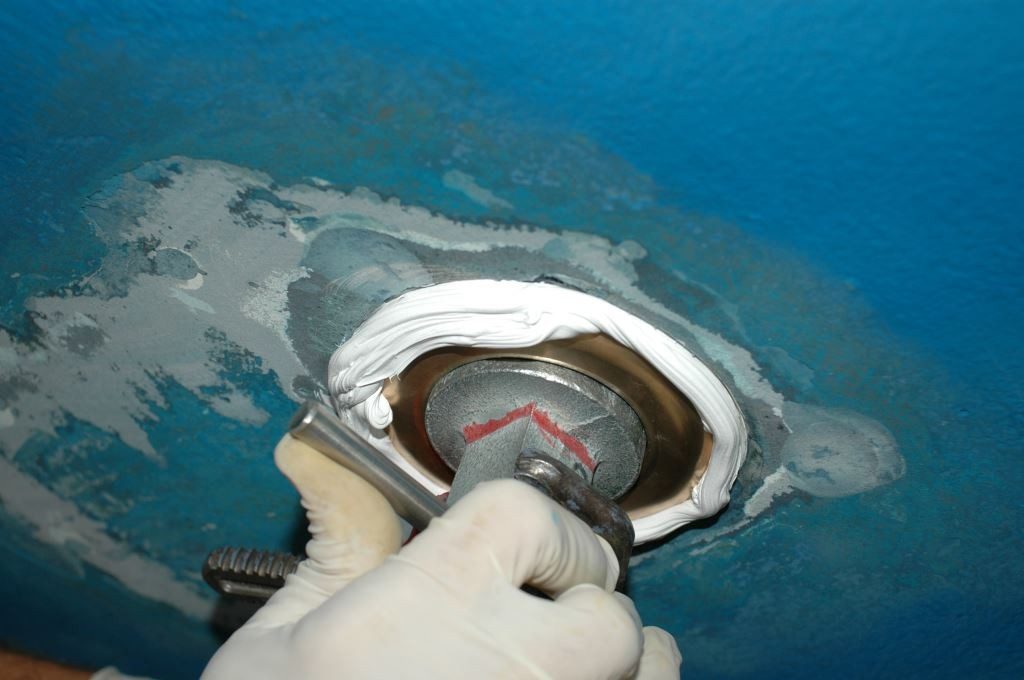
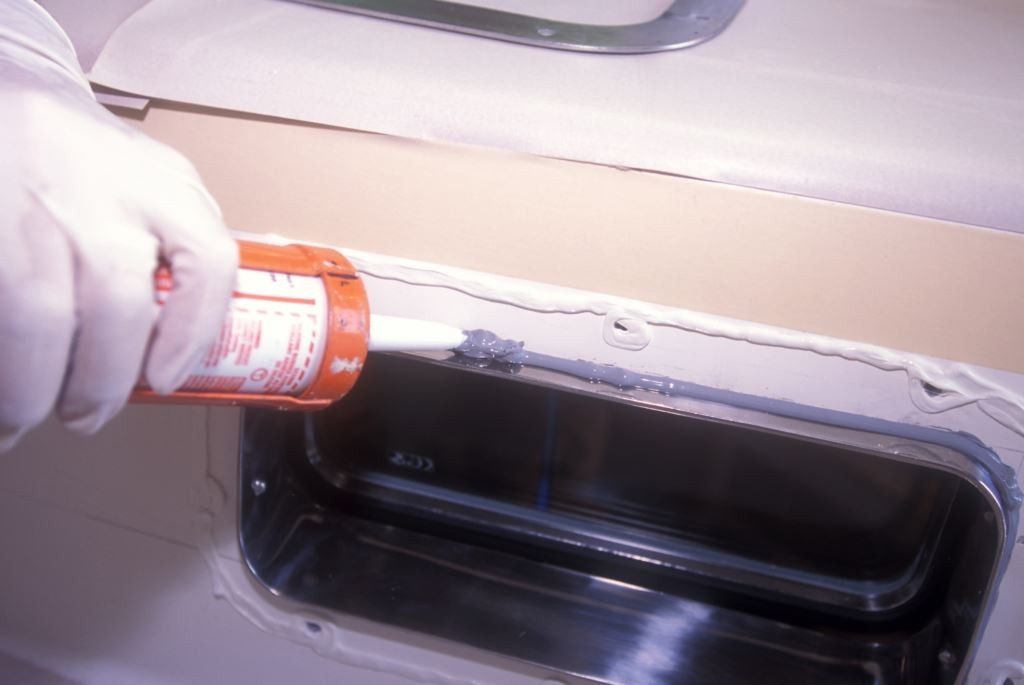
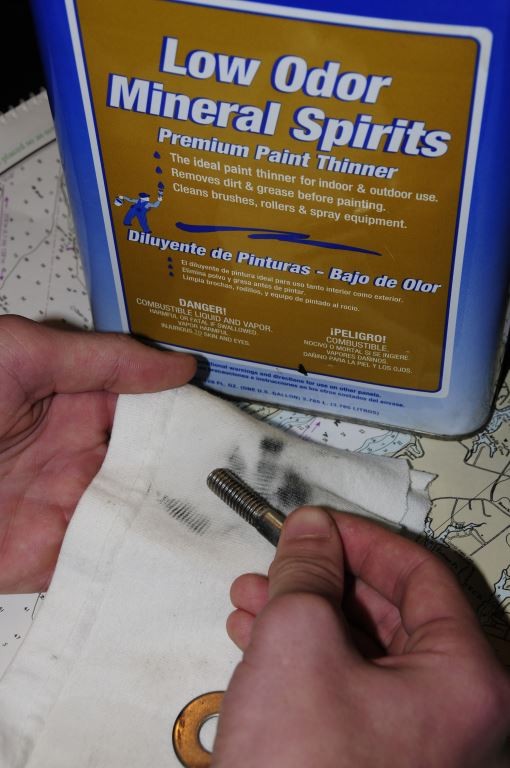
Wearing rubber gloves, wet a rag with a solvent that will evaporate completely, I prefer mineral spirits or 3M General Purpose Adhesive Remover, then wipe down the hardware, including the fasteners. You will notice the rag will turn black when doing so, evidence of the removal of wax, oil and other contaminants. Then, using a new rag, or a different portion of the same rag, wet with solvent and wipe down the surface that is to be bedded, the deck or cabin top for instance; then apply an ample quantity of sealant to the hardware as well as the underside of the fastener heads and shanks. The entire underside of the hardware base, not simply the area around the fastener holes, should be coated in sealant; failing to do so allows water to migrate into this gap, which, in the case of stainless steel, may lead to crevice corrosion and will almost certainly lead to brown staining. Place the hardware on the installation surface, install fasteners and torque evenly and fully, ensuring sealant squeezes out around the entire perimeter. Dock lore calls for partial torqueing, then allowing sealant to cure, and then returning for a final torque days or weeks later. That approach is flawed for two reasons; first, caulk is not a gasket per se, when used in this manner and stressed in high load scenarios such as stanchions and cleats it often splits and fails. Second, there is too great a likelihood of forgetting to carry out the final torque procedure.
As an aside, it pays to rout, drill or file a fillet or funnel-shape to the entry portion of a hole through which a bedded fastener will pass. Doing so will allow a quantity of sealant to be retained here, creatring an O ring of sorts.
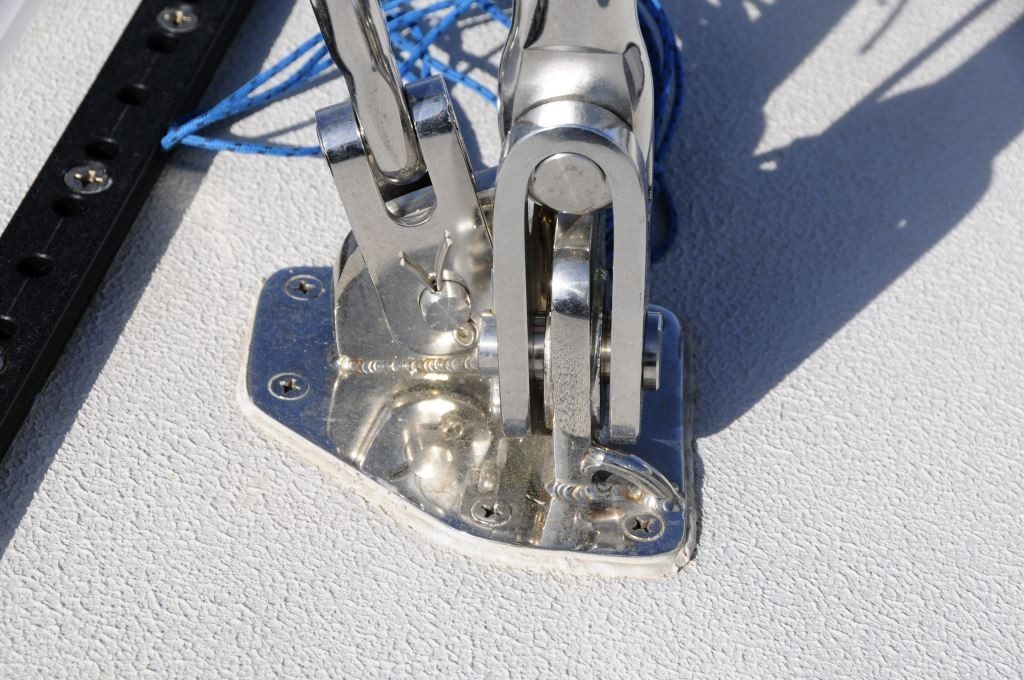
Stainless Steel and PU
Stainless steel can present a challenge where caulk adhesion is concerned. Over time, most PU sealant will release from stainless steel. This is often the result of surface contamination, wax, oil etc. Additionally, stainless components are often highly polished, and these ultra-shiny, smooth surfaces can make it difficult the sealant to get a grip. If the sealant is in compression between the hardware and installation surface, release probably isn’t an issue because the seal remains effective. Ideally, stainless components should not only be de-waxed, their contact surfaces should also be made slightly rough using Emory cloth. For free-standing caulking scenarios, exposed beads of caulk around a chain plate or windlass base, for instance, don’t expect PU sealant to remain adhered to stainless steel without additional preparation. Additionally, in these cases a UV stabile PU, PS or silicone sealant should be used.
For deck hardware applications, do not apply sealant to any of the parts installed inside the vessel, nuts, washers and backing plates, doing so will only retain water that leaks past the outer seal, where it will accumulate, stagnate and cause stainless steel to crevice corrode, while increasing the likelihood of water migration into cored substrates.
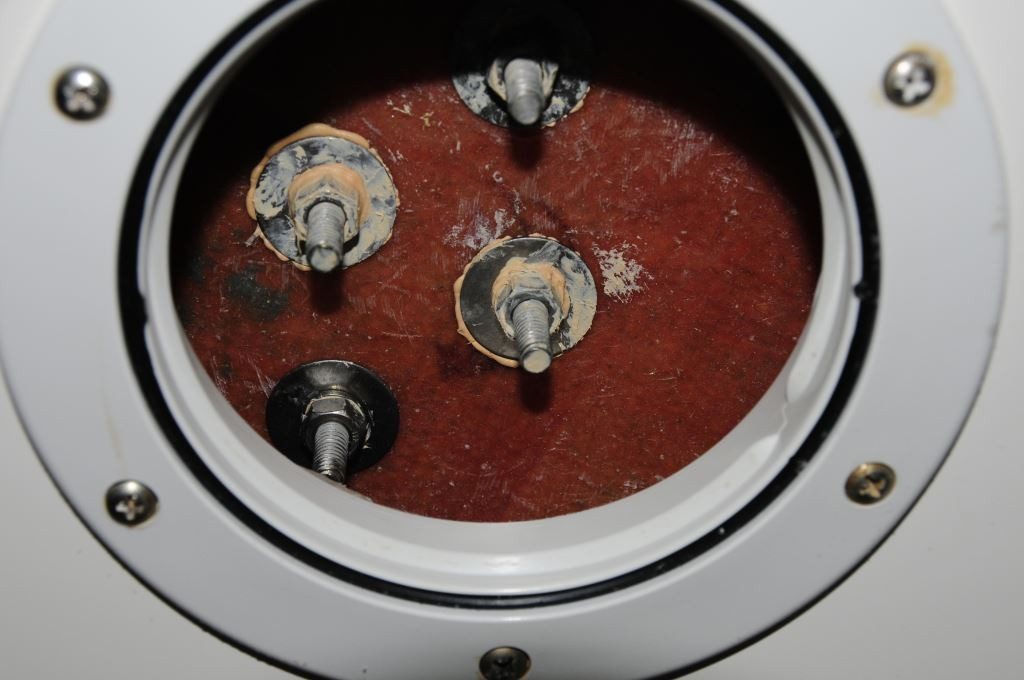
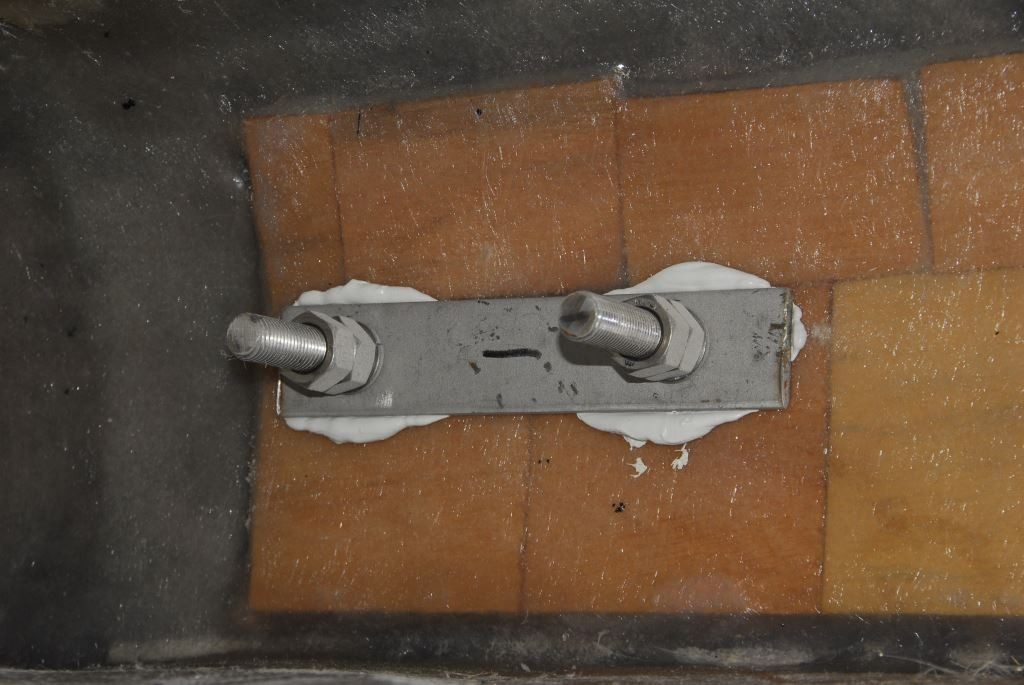
Deck hardware should not be bedded on the interior. Doing so will trap water in the fastener penetration, increasing the likelihood of both corrosion and migration of water into cored substrates.
Masking the area around the hardware to be bedded can make cleanup easier. Fillets can be created using a concrete steel ball caulking tool set, essentially a round metallic ball on the end of a wand. Keeping it wet with water will prevent caulk from sticking to it, allowing you to form smooth caulk beads. Remove excess caulk with a plastic scraper or tongue depressor, and then use solvent; tape should be pulled after the sealant is tacky; don’t wait until it cures fully or you’ll be forced to cut it away using a razor blade. Be sure to follow instructions carefully, most polyurethane sealant manufacturers prohibit the use of denatured alcohol for clean-up, as it can inhibit the curing process.