Heat Exchanger TLC
Text and photos © 2020 Steve D’Antonio Marine Consulting, Inc.
From the Masthead

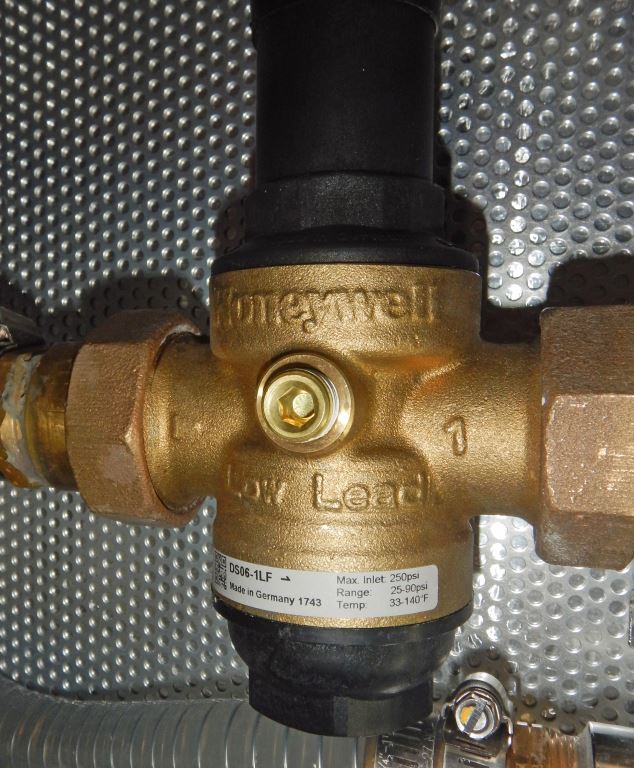
A few months ago, while carrying out an inspection on a new vessel, I asked the builder if they could confirm that all of the many brass and bronze potable water plumbing fittings were lead-free.
Because of its malleability and low melting point, lead has been used for potable water transport for centuries. Some Roman aqueducts were lined with lead, although they knew even then that it was unhealthy for this purpose. At one time it was not uncommon for the pipes supplying water to homes, the service lines, to be made entirely of lead. Today, the issue is mainly limited to plumbing fittings, fixtures and solder.
While lead has been banned from potable water plumbing for decades, because of its now well-established harmful health effects, the rules continue to evolve, the most recent iteration of which requires “manufacturers or importers to certify that their products meet the requirements using a consistent verification process within 3 years of the final rule publication date in the Federal Register”. Section 1417 of the Safe Drinking Water Act (SDWA) establishes the definition for “lead free” as the following, “A weighted average of 0.25% lead calculated across the wetted surfaces of a pipe, pipe fitting, plumbing fitting, and fixture and 0.2% lead for solder and flux. In 1986 “lead-free” pipe was defined as no more than 8%. In 2011 that was further reduced to (a weighted average across the wetted surface of) 0.25%.
Lead is more likely to leach from plumbing if the water is acidic; the water produced by reverse osmosis is, because it is devoid of minerals, slightly acidic, making that a potential issue for many vessels equipped with water makers. Where lead is present in fittings, its content in the water is affected by the duration of contact, i.e. if the water has been standing in the fitting for days or weeks, lead is more likely to leach into the water, and temperature; hot water dissolves lead more readily than cold.
Not all bronze and brass, off the shelf plumbing fittings are certified lead-free, which is fine if it’s being used for raw water, at least in the case of bronze (brass must never be used for raw water applications), and most fittings found in chandleries are made in the far east any event, making their lead content more difficult to identify. Home improvement stores are a safer bet if purchasing brass fittings in their potable water aisles, most are shelf labeled or tagged as lead-free. I recently searched on line for a 1” brass hose mender for a project I’m working on; I could find plenty that contained 2-4% lead, but none that were lead free by today’s SDWA 0.25% standard.
Some filters that are designed to remove lead (I recommend whole vessel filtration in any event, however, that is not effective if the vessel’s plumbing contains lead as it’s after the filter), typically using carbon. Remember, the lead removal must occur at the point of use, i.e. using an under-sink filter and dedicated faucet.
Other than in the rare case where that are marked, there is unfortunately no way to determine if plumbing fittings, fixtures, elbows, unions, barbs etc. are lead free simply by visual inspection. However, you can send samples of your water to a lab for testing. For the most accurate, worst-case scenario test, use water from any faucet from which you might drink, and which has been standing in the plumbing for some time, at least several days.
The boat builder’s answer to my question, by the way, “We don’t know”. If you are purchasing a new vessel, or having one built, or refit, it’s a question, “is the potable water plumbing certified to be lead-free?” worth asking.
This month’s Marine Systems Excellence eMagazine feature covers the subject of heat exchangers. I hope you find it interesting and useful.
Heat Exchanger TLC
It’s the radiator of your marine engine, however, unlike an automobile, your marine engine transfers its waste heat, via its closed cooling system, from coolant to seawater rather than air, using a heat exchanger.
While there are several different designs, the most common is the tube bundle variety. The external shell looks a bit like a pipe; housed within are a series of drinking straw-like tubes which are surrounded by coolant. Seawater passes through the tubes, absorbing heat from the coolant. It’s a simple arrangement that allows engines and gensets to be filled with coolant rather than seawater, thereby reducing corrosion and increasing efficiency.
Engines that are cooled by seawater directly must operate at a lower, and therefore less efficient, temperature to prevent salt from precipitating and accumulating within the cooling passages. They are also of course, far more prone to corrosion.
As simple as heat exchangers are, they are far from foolproof. The mixture of hot coolant and cold seawater makes for a stressful life where metal is concerned. Add to that the potential for corrosion and likelihood for failure goes up considerably, particularly if they are ill-maintained.
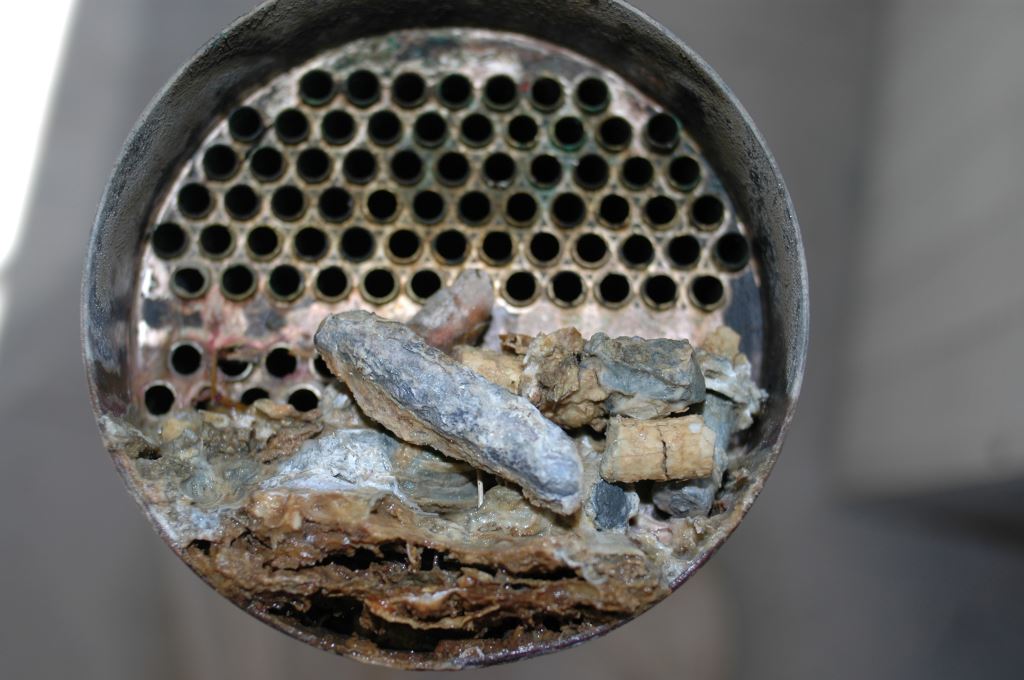
Most, but not all, heat exchangers are equipped with sacrificial anodes, which must be replaced regularly. Their consumption rate varies with conditions, use, water temperature and salinity. While many users simply replace them seasonally, it’s best to initially remove them monthly for inspection, to determine their rate of consumption for your use patterns. In some cases they may need to be replaced annually, in others more often. Anodes should be replaced when they are 50% or more depleted. One of the more common maladies where anodes are concerned is accumulation of depleted “pencils” in the chamber at the end of the heat exchanger.
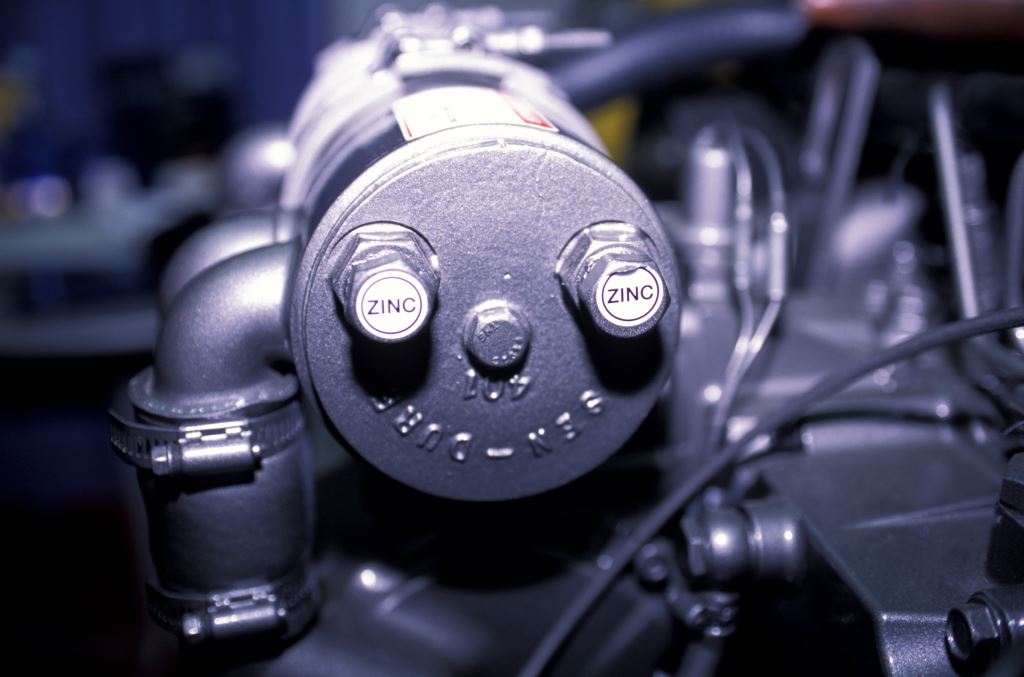
Contrary to popular belief, these anodes are not consumed, as their electrical contact with the heat exchanger housing is tenuous at best. Instead, they simply pile up, blocking water flow in the process. If you remove the anode plug and there’s no remnant of a pencil anode attached, it likely means two things, your replacement interval is too long, and some portion of the anode has been left behind; they rarely erode away completely without separating from the plug.
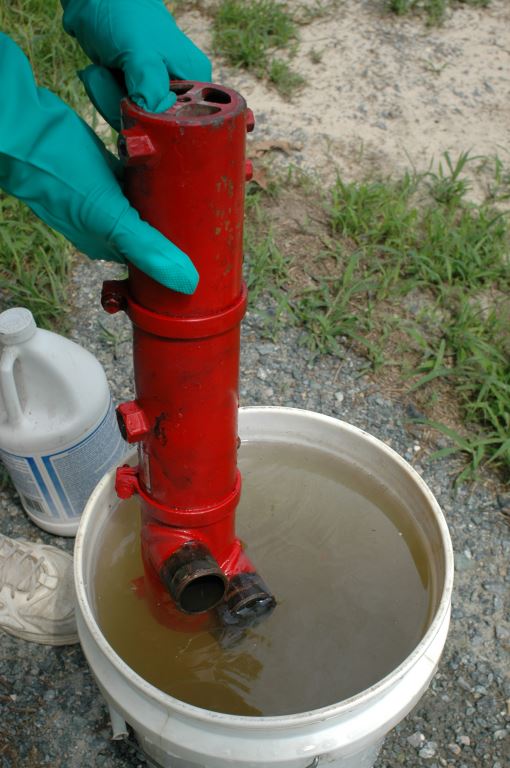
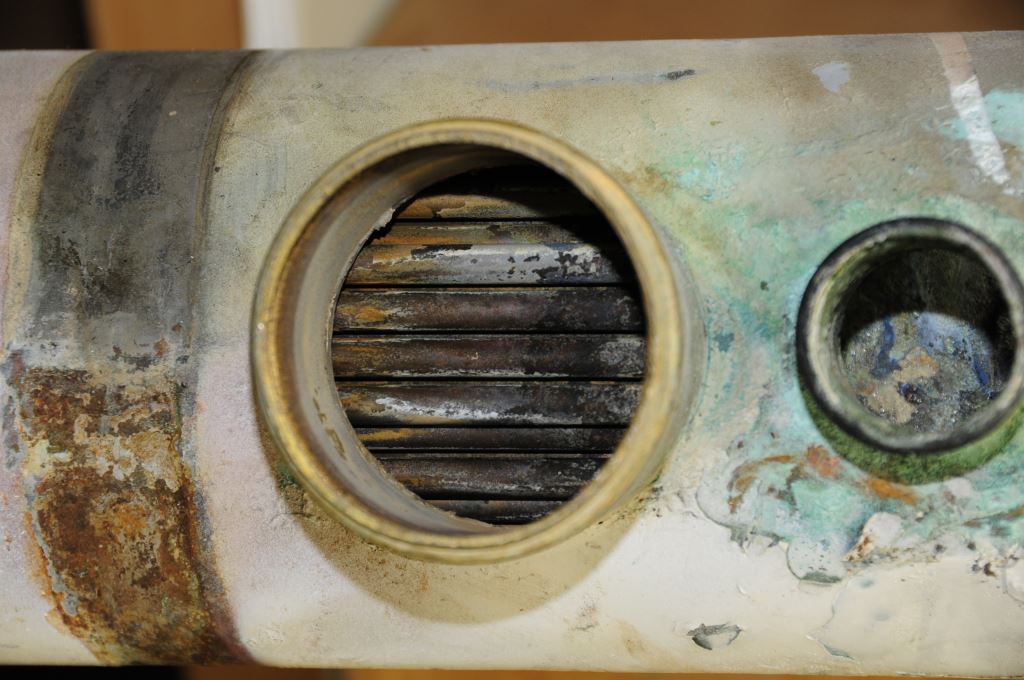
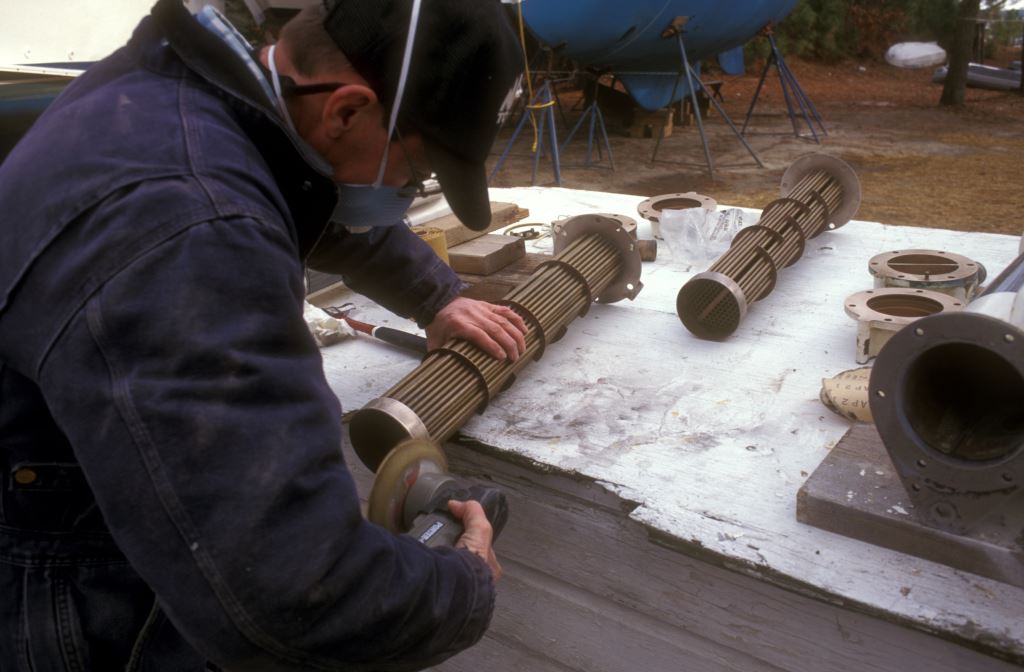
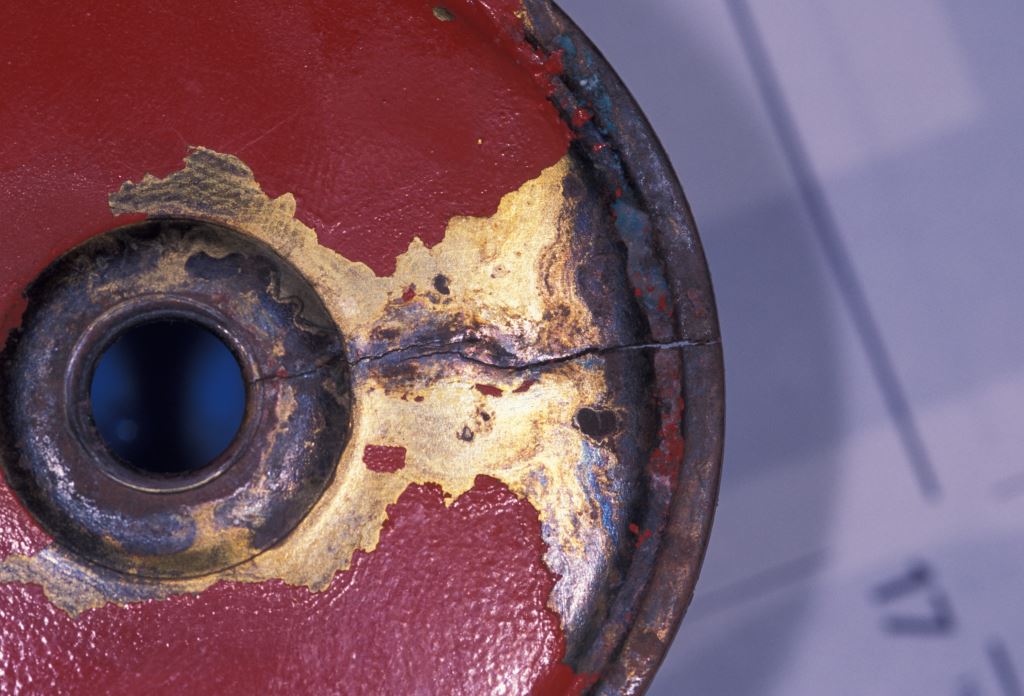
For this and other reasons, heat exchanger end caps should be removed every other year for an inspection and clean out. Doing so is typically straightforward and well within the capabilities of a do-it-yourselfer with moderate technical skills; replacement gaskets should be on hand as these often tear or are not reusable; be sure not to over tighten end caps as many are conical and will crack if fasteners are over-tensioned.
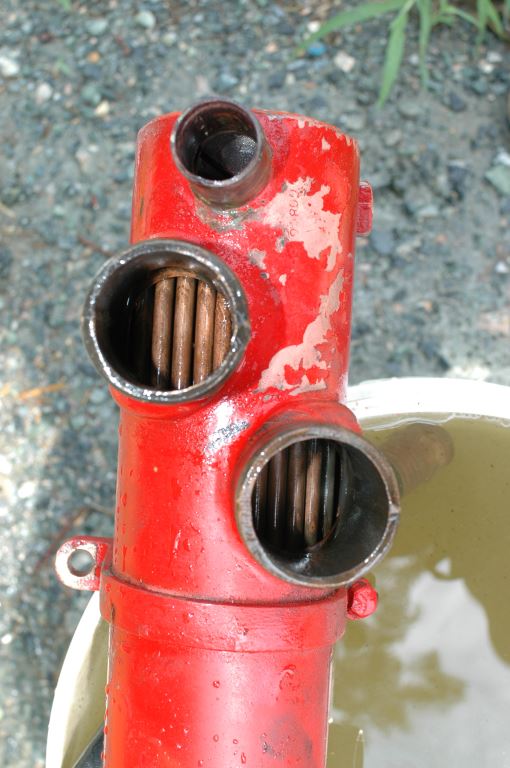
Look carefully at the detritus you remove, if it’s dead zincs and a bit of sea grass, that’s typical, however, if you see impeller parts be sure to check the raw water pump. Virtually every heat exchanger I open does contain some impeller parts, often years old, and often from previous impellers, so don’t be surprised if the impeller inspection yields no damage. Regardless, it should still be checked if pieces are discovered in the heat exchange.

If both ends of the heat exchanger can be opened, do so and place a bright light at the far end. Look through the tubes to determine if there are any obstructions. If so a shot form a garden hose may blast them out, otherwise you may need to be more aggressive. Soft, solid copper wire (insulated is best) that offers a loose fit in the tube can be used to gently push through obstructions.
Alternatively a wooden dowel may also be used. Never use steel wire, as it may damage tubes. The watch word here is caution, go easy, and never force anything into the tubes. If there is evidence of scale build up, a chemical flush/descaling will be the required.