Troubleshooting Overheating Scenarios – Editorial: Blisters and Drying Bottoms
From the Masthead

Blisters and Drying Bottoms
Bottom blisters and their repair; after corrosion, it is the most commonly misunderstood subject under the boat ownership sun. I routinely receive emails from owners, or respond to forum posts, that begin with, “The boat yard sanded off the gelcoat and dried my bottom…” Let me begin by unequivocally busting a commonly-held myth, one that is, much to my frustration, all too pervasive within the marine industry… fiberglass laminate cannot be “dried”, period. Or perhaps I should say, fiberglass bottoms cannot be dried, and thereby successfully ward of the future formation of blisters.
If water migrates into a fiberglass laminate, and if it encounters water soluble materials or WSM’s (these are often binding agents used to hold fiberglass fabric together before it is saturated with resin, or agents that promote adhesion between resin and fabric), a chemical reaction occurs, one which involves the phenomenon of osmosis, which in turn creates pressure, which in turn leads to the formation of blisters.
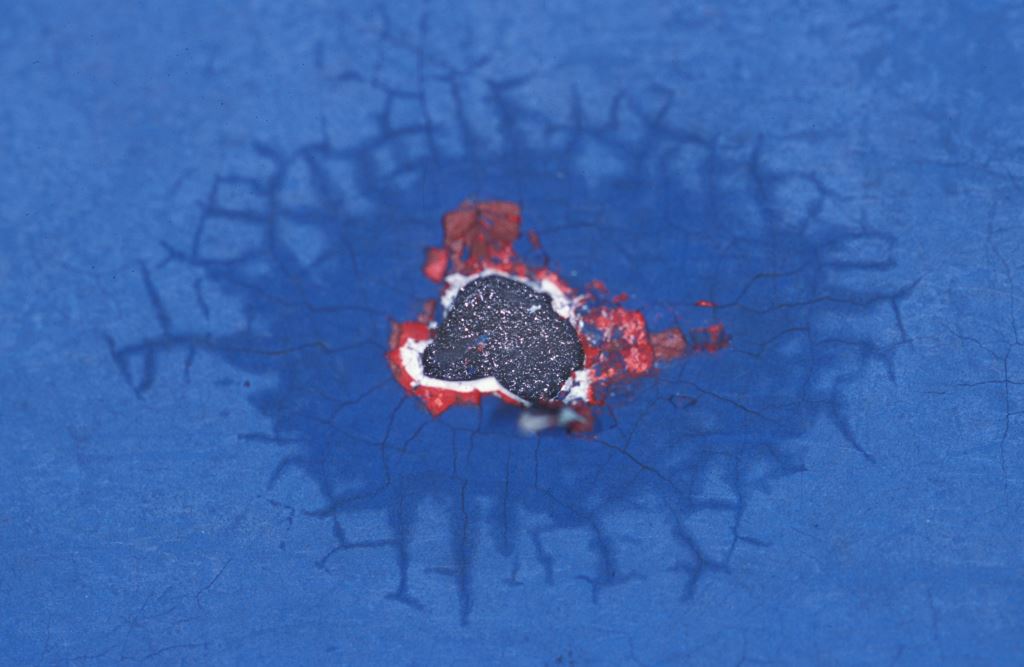
Those who are not schooled in how osmotic blisters occur, often fixate on moisture removal. In fact, even if you could get water to evaporate from a fiberglass laminate, two of the byproducts of osmosis are glycol and acetic acid, neither of which evaporate at atmospheric pressure or room temperature. They therefore remain, and are for the most part undetectable by a moisture meter, which is calibrated for water, and they continue to do damage in attacking the resin, causing what’s known as resin corrosion or fiber whiting, areas that appear to have never been wet-out with resin, but in fact where resin has been dissolved.
In the broader view, I have yet to encounter a boat yard or professional blister repair service that offers a meaningful warranty, five or more years, against reformation of blisters, subsequent to drying and spot repairing blisters. “Drying”, and spot repairing by grinding and filling each blister, fixes the symptom, it does not cure the disease. The only long-lasting approach toward repairing osmotically blistered bottoms involves removal, typically by peeling, the moisture affected laminate, and re-laminating with vinyl-ester resin, which has proven to be osmotic blister-resistant, if not blister-proof. For more on osmosis, blister prevention and repair see this article.
This month’s Marine Systems Excellence eMagazine feature covers the subject of troubleshooting engine overheating, I hope you find it both useful and interesting.
Troubleshooting Overheating Scenarios
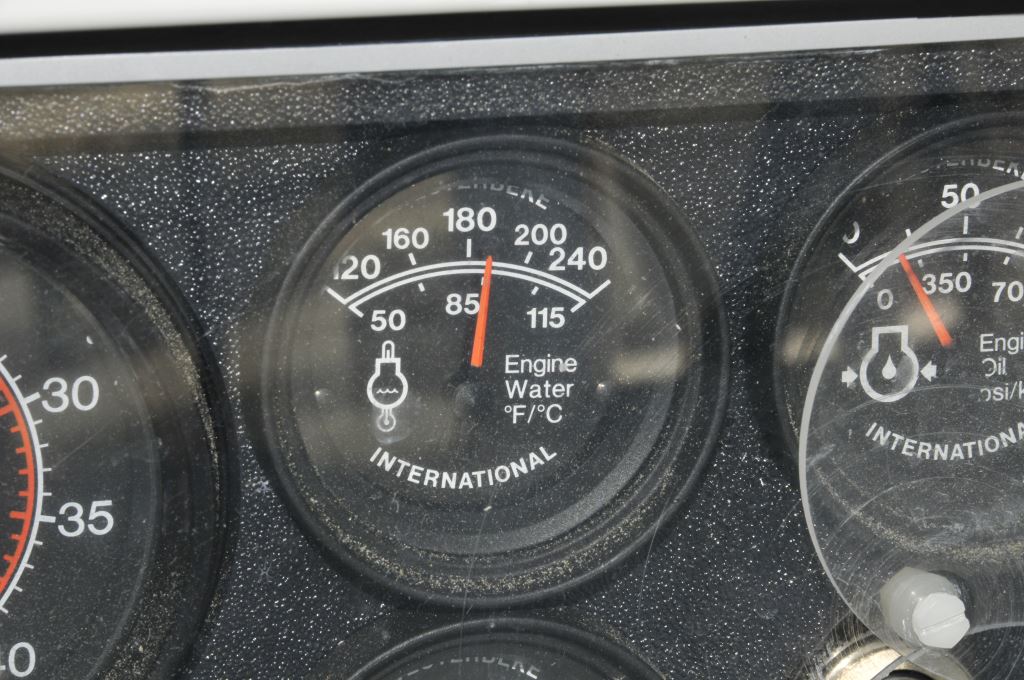
Pay close attention to your engine’s temperature gauge, if it runs higher than usual, even if not overheating, it’s an early indication of a problem.
I recently remotely assisted a client resolve an overheating problem, and in doing so it reminded me of the importance of cruisers having a clear understanding of their engines’ cooling system, and where it’s most likely to go awry.
Overheating is perhaps the most common malady to befall a vessel’s propulsion system or generator, it is stressful to both engine and crew. For the former, a serious overheat can result in costly damage, including warped cylinder heads, leaking head gaskets, and scored cylinder walls. It’s a fate well worth avoiding, and fortunately avoiding it is relatively easy. For the latter it can be a wallet-draining experience.
Overheating Scenarios
There are two means by which an engine (or generator) may overheat; chronic and acute. Chronic overheating typically occurs when moving past a given engine rpm, as you do so the temperature gauge slowly climbs toward the red. The “red” zone, by the way, which may or may not be red on the temperature gauge, if your engine has one (it should and it can and should be added to any engine that isn’t so equipped) varies from engine manufacturer to engine manufacturer, and is dependent on the engine’s thermostat, however, typically, anything above 195 Fahrenheit (90C) begins to reach the level of concern, while many overheat alarms are triggered at somewhere around 205 Fahrenheit (96C). Once the throttle is pulled back, the temperature gauge needle falls back to its normal position. Chronic overheating is often accompanied by a white “steamy” rather than smoky exhaust.
Exhaust elbows, especially those made of cast iron, are prone to scaling, which impedes water flow, which in turn leads to overheating.
Acute overheating occurs without warning, with the gauge rising rapidly, often regardless of rpm. Both are problematic; however, chronic overheating is, in some ways, more of an issue because the user is lulled into a false sense of security. If greater power is needed, to extricate the vessel from a grounding, when beating into a head sea, or in the event of an onboard medical or other emergency, the engine will not provide the power that’s needed without overheating, while in the case of acute overheating, the problem must be identified and resolved as soon as possible.
Impellers should be replaced annually, doing so virtually eliminates the possibility of a failure. If your impeller should come to grief, make certain you retrieve the pieces it has shed.
Common Causes
It’s best to take a methodical approach to resolving overheating situations, trying the easiest potential fixes first. Begin with the water supply, is the strainer clear, including the one on the hull if you have one? More on strainers here.
Confirm water flow, when running, is the engine pumping water out with the exhaust as usual (if the engine or genset is equipped with a water/gas separator, this can be challenging to determine, however, you can briefly close the underwater discharge seacock, which will force water to flow out of the above the water line gas discharge)? If you aren’t sure, with the engine off, you can check flow by closing the seacock, opening the strainer lid, and then slowly opening the seacock, water should flow freely.
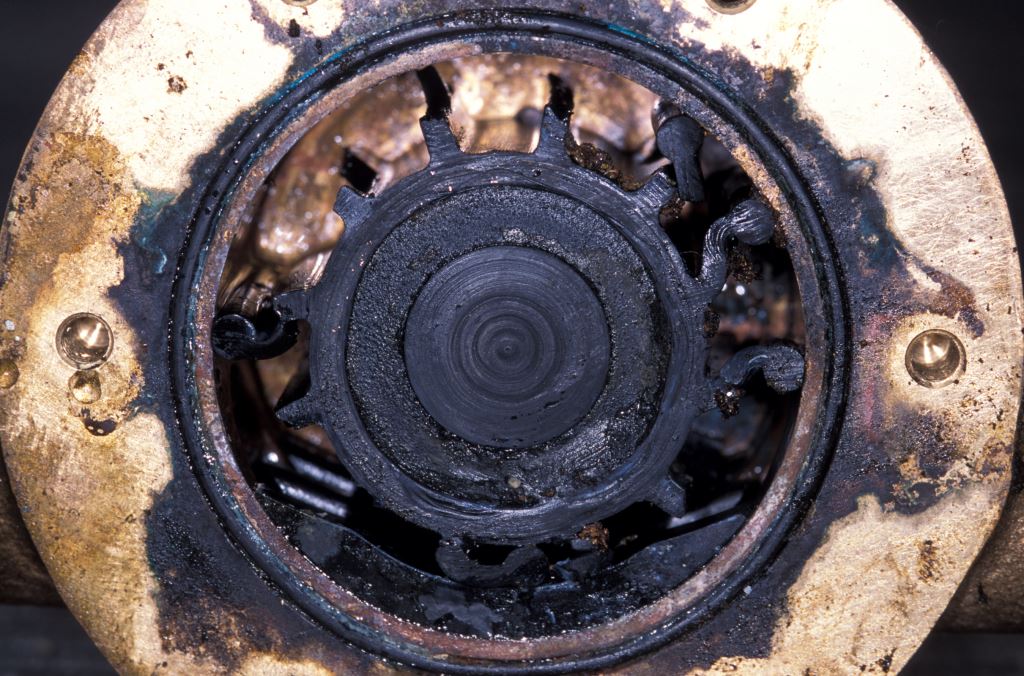
Check the raw water pump by removing the impeller cover (be ready with a replacement O ring or gasket), is the impeller intact, with no cracks or missing blades, and does it turn when the engine is cranked (without actually starting if you can help it)? If belt driven, make sure the belt is not slipping. Is the inside of the cover plate smooth? If it is grooved or scored, it must be replaced. Is the cam, the part that actually compresses the impeller blades, effecting the pumping action, worn? You may not be able to tell unless you can compare it to a new one side by side.
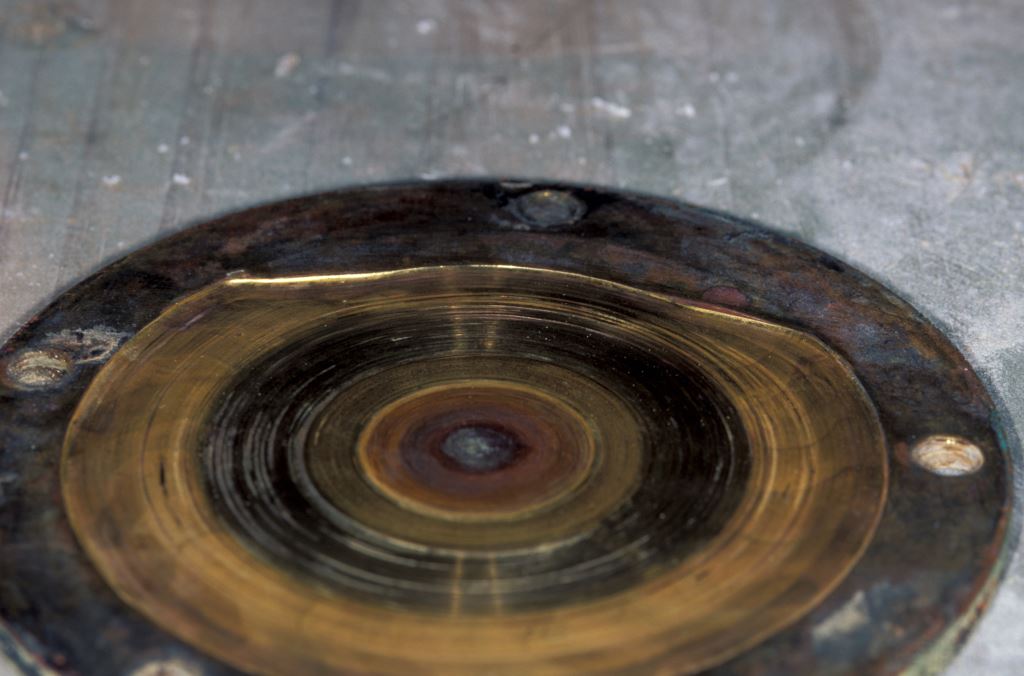
If you can feel a ridge in your water pump’s cover plate, it’s time for it to be replaced.
If the impeller is damaged torn or missing blades, clearly it needs to be replaced. If parts are missing, you’ll need to go in search of them. Fortunately, in most cases these become lodged at the inlet side of the heat exchanger, which you can access by removing the end cap. More on raw water pumps here.
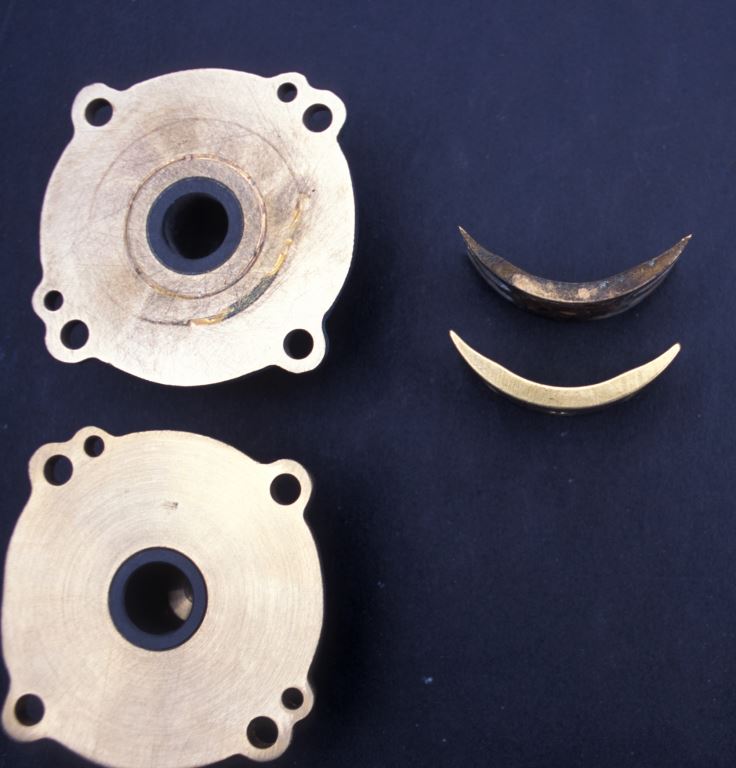

It’s often difficult to gauge wear on water pump parts until they are compared to new components.
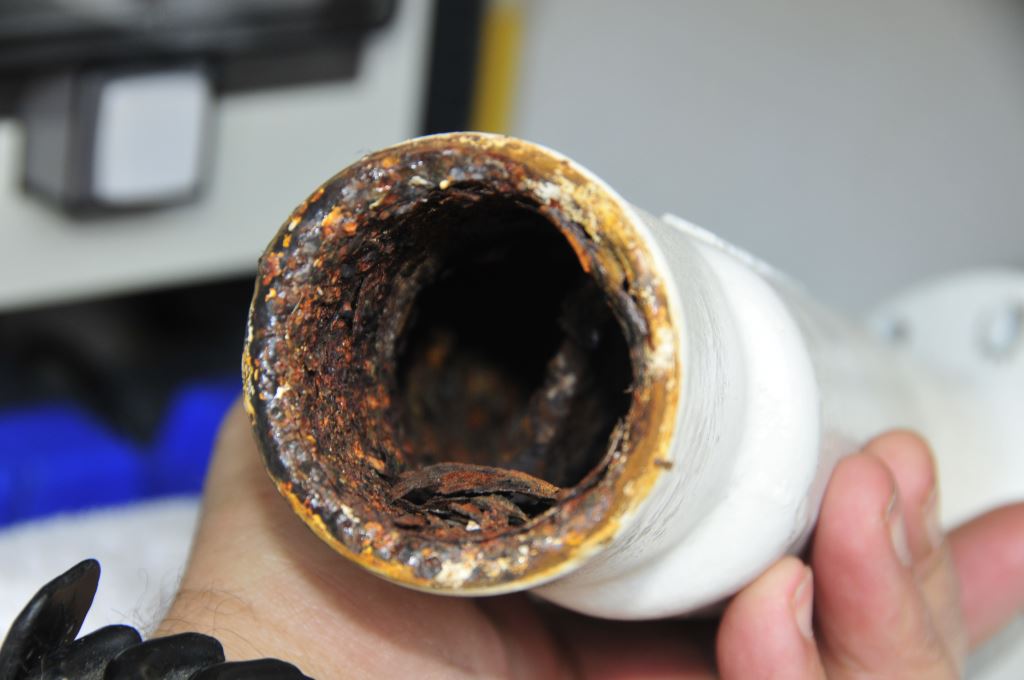
Next, remove the end caps of the heat exchanger, and check for debris, depleted pencil anodes, as well as clogged or scaled tubes (the thinnest scale accumulation can have a dramatic effect on the ability of the heat exchanger to transfer heat). If scaled the heat exchanger will require flushing with a descaling solution.
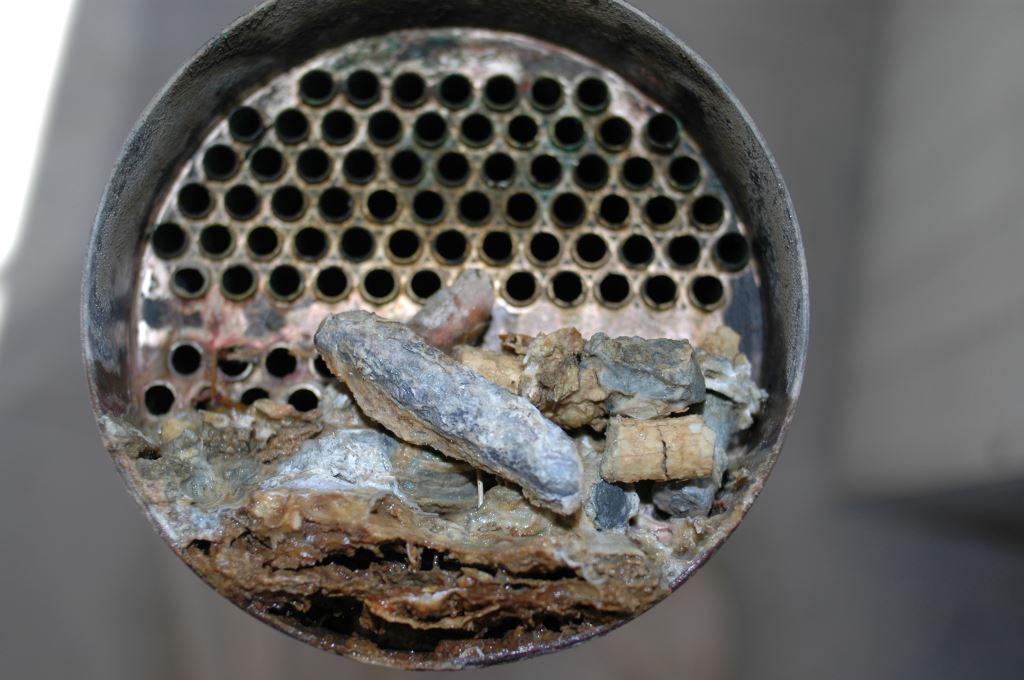
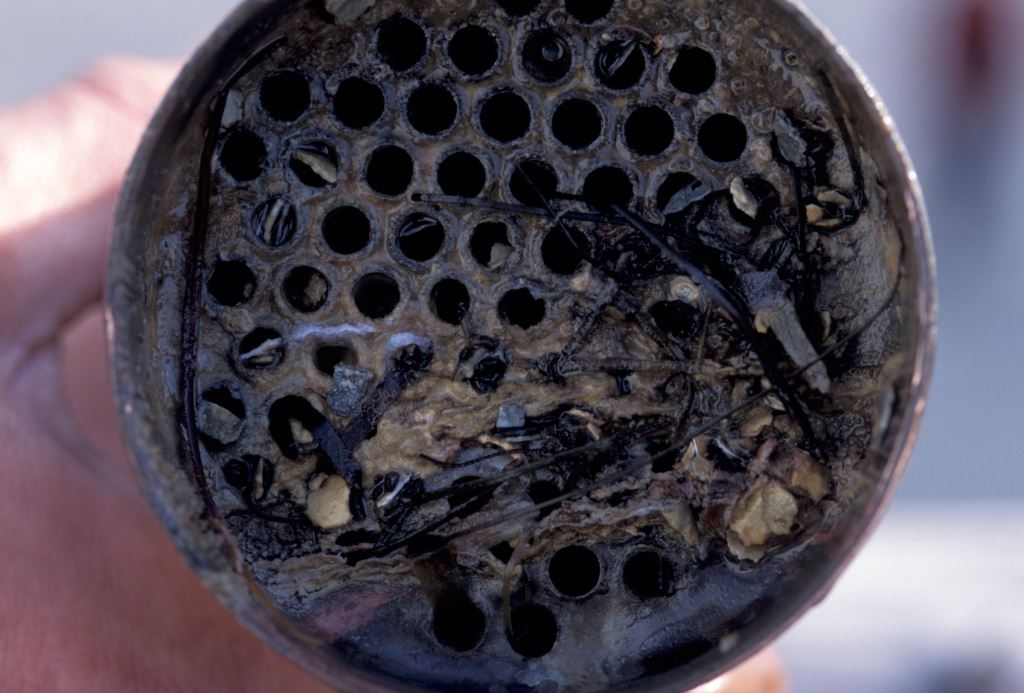
Heat exchangers should be inspected for debris accumulation about every two years, even if overheating isn’t an issue; it’s not unusual to find depleted anodes.
Keep in mind, many engines have more than one heat exchanger; in addition to the primary one used for engine cooling, there may be oil, or transmission fluid coolers as well, which are typically plumbed into the raw water intake circuit. In one case I worked on a few years ago, a persistent overheat at anything over about 50% throttle had everyone pulling their hair out, until it was discovered that pine straw had accumulated (it passed through both hull and internal strainers) on the inlet side of the raw water fuel cooler, which impeded water flow to the engine’s own heat exchanger. More on heat exchangers here.
In the event of an overheat, it’s possible for an undetectable film to develop on the coolant side of the heat exchanger, which in turn will lead to poor heat transfer and overheating.
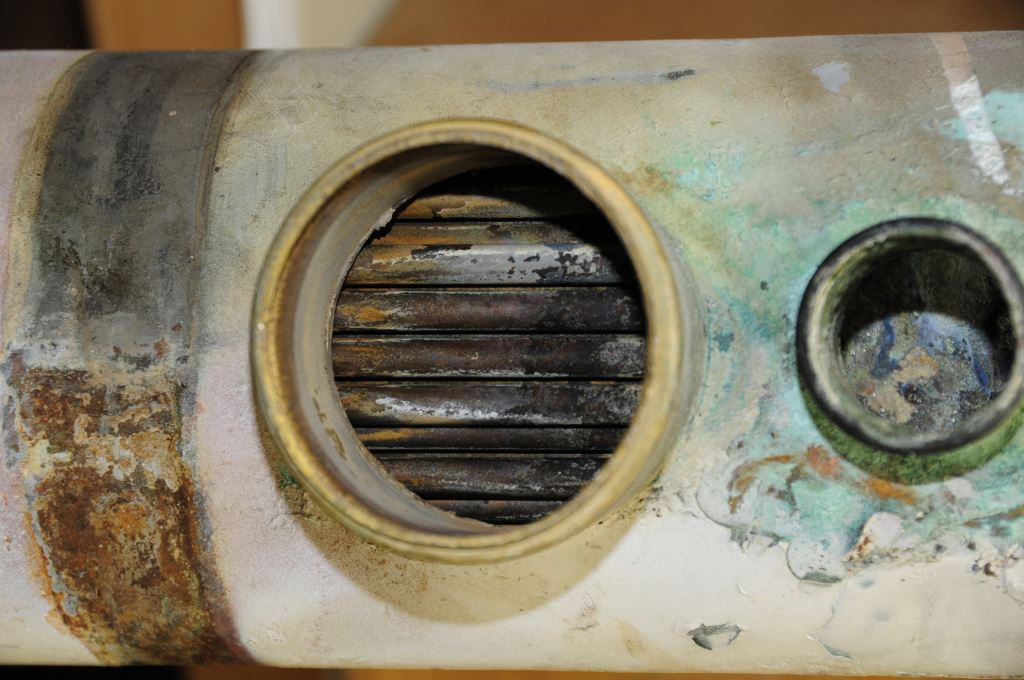
Next, check the injected elbow. These are notorious for becoming clogged with corrosion, acting like a bottle neck, a restriction slows down water flow through the entire raw water-cooling system. One test you can perform to determine of this is the culprit involves temperature differential; what is the difference between the temperature of the water entering the engine, i.e., seawater temperature, and that leaving the engine at the exhaust outlet? It comes as a surprise to many that the delta should not exceed about 20° Fahrenheit (11C). If it’s greater, there’s a possibility you are dealing with a restriction in the exhaust elbow, or water supply to the elbow. More on wet exhaust systems here.
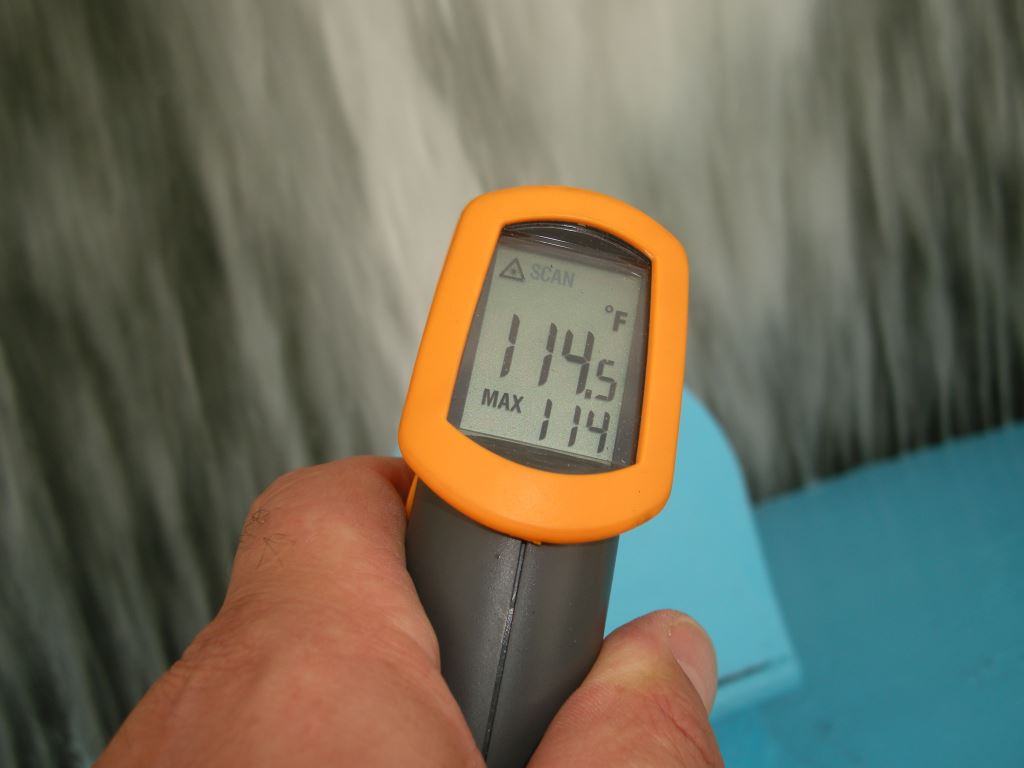
There should be no more than about a 20° Fahrenheit (11°C) differential between the temperature of water entering, and the temperature of water leaving your engine. More than that is an indication of cooling system problems.
If all of these turn out to be overheat dead ends, you can move on to the thermostat. While these rarely fail, it does happen from time to time.
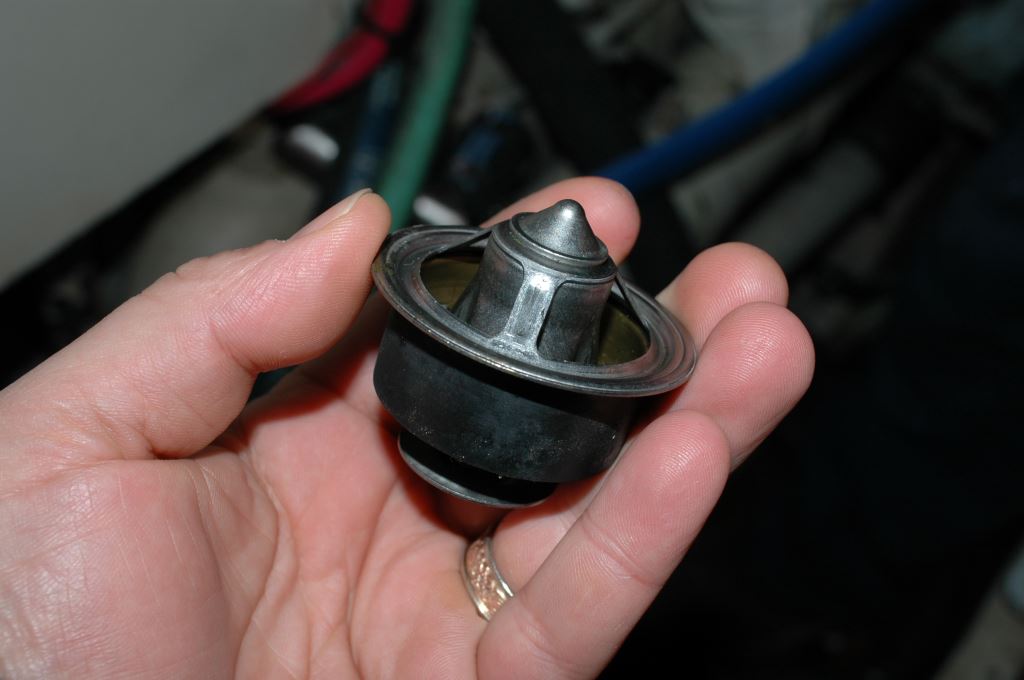
While typically very reliable, thermostats can fail to open fully, which can lead to overheating. These should be replaced when coolant is renewed, every two or three years.
Finally, if your engine does suffer a serious overheat, it’s a good idea to replace the coolant and flush/descale the closed (coolant) side of the cooling system. Overheating can permanently degrade the coolant, while leaving an insulating film on the coolant side of the heat exchanger’s tubes.