
Text and photos by Steve D’Antonio
Copyright © 2017
From the Masthead
I recently wrote an editorial for a marine industry publication, lamenting the lack of a formal marine industry apprenticeship in the United States. While there are schools and programs here and there, there is nothing nationwide, nothing unified or standardized as it is elsewhere, in other countries with a mature marine industry like the one here in the United States. While I’ll share that editorial in its entirety once it’s printed, it is destined for the marine industry, and I’d like to give this subject broader reach. This excerpt, from an article published a few days ago in Soundings Trade Only, another industry publication, sums up what I believe is a potentially bleak scenario.
“The Marine Retailers Association of the Americas is listening to dealers who increasingly express concern about a workforce shortage. After gathering mounting anecdotal evidence that the shortage is reaching crisis mode, the MRAA decided to compile data regarding the situation. After releasing a report detailing how widespread the problem was, the group is now issuing the results of its compensation survey — the first of its kind in the marine industry. “The problem is multifaceted — to wrap your head around it is pretty difficult,” MRAA president Matt Gruhn said. “We went through a whole campaign cycle [to elect] our nation’s president, and they were all talking about job creation. We’re not faced with a job-creation challenge today. Our industry, and a lot of other industries, is faced with finding people to fill the jobs.”
The inability to readily fill industry job positions does not necessarily bode well for the boat owner. When boat yards and other marine industry entities are unable to find enough qualified people to fill their ranks, the standards tend to drop, and the wages go up. While the latter is good for folks in the marine industry, the higher cost is passed on to boat owners. Trust me, I’ve been there, I ran boat yards during economic upswings and pickings were slim, forcing us to recruit nationwide, offer higher salaries, and pay to move folks from as far away as the Pacific Northwest and Midwest to fill critical job positions at an East Coast location.
Enter a marine trades apprenticeship program, one that I believe would produce a steady flow of well-trained, vetted, enthusiastic professionals to fill this ever-widening void. Such a program would raise the standards, thereby ensuring greater satisfaction and cost effectiveness for boat owners, which would in turn increase boat ownership ranks, something the marine industry has rightfully been wringing its collective hands about for a decade. Furthermore, I would argue that the higher skill level that results from an apprenticeship program would in fact drive down the cost of boat ownership, as diagnosis would occur more quickly and repairs would be carried out correctly, the first time. As I say in the closing lines of the editorial, “We as an industry need to take matters into our own hands, if for no other reason than self-preservation. We need an organized trade apprenticeship program, and we need it now.”
This month’s Marine Systems Excellence eMagazine covers the subject of conventional stuffing boxes, I hope you find it both useful and interesting.
Conventional Wisdom for Conventional Stuffing Boxes
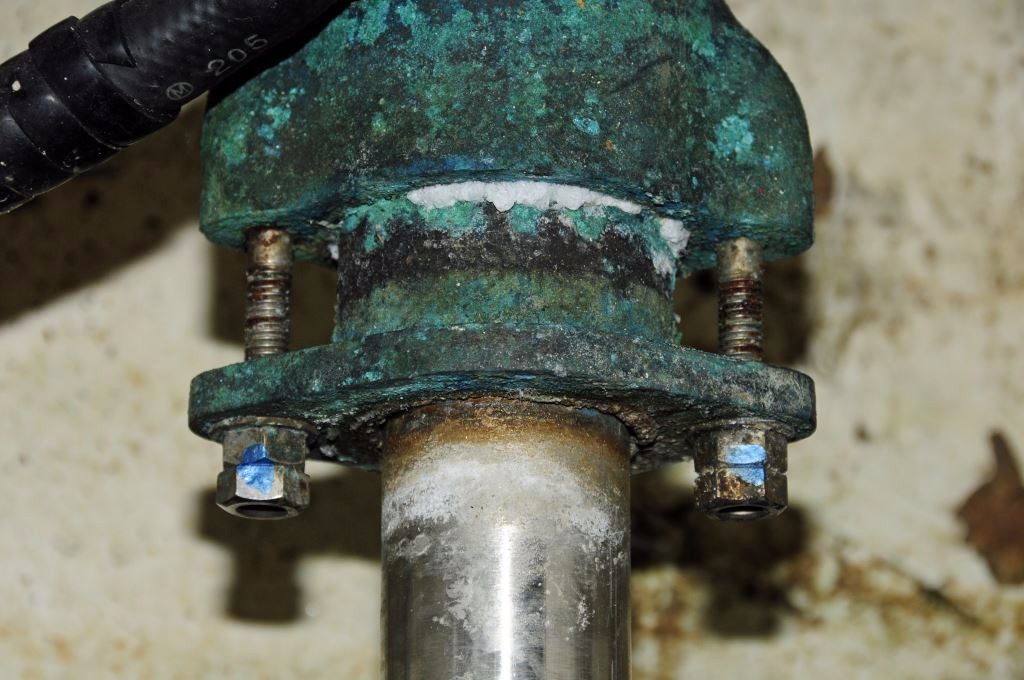
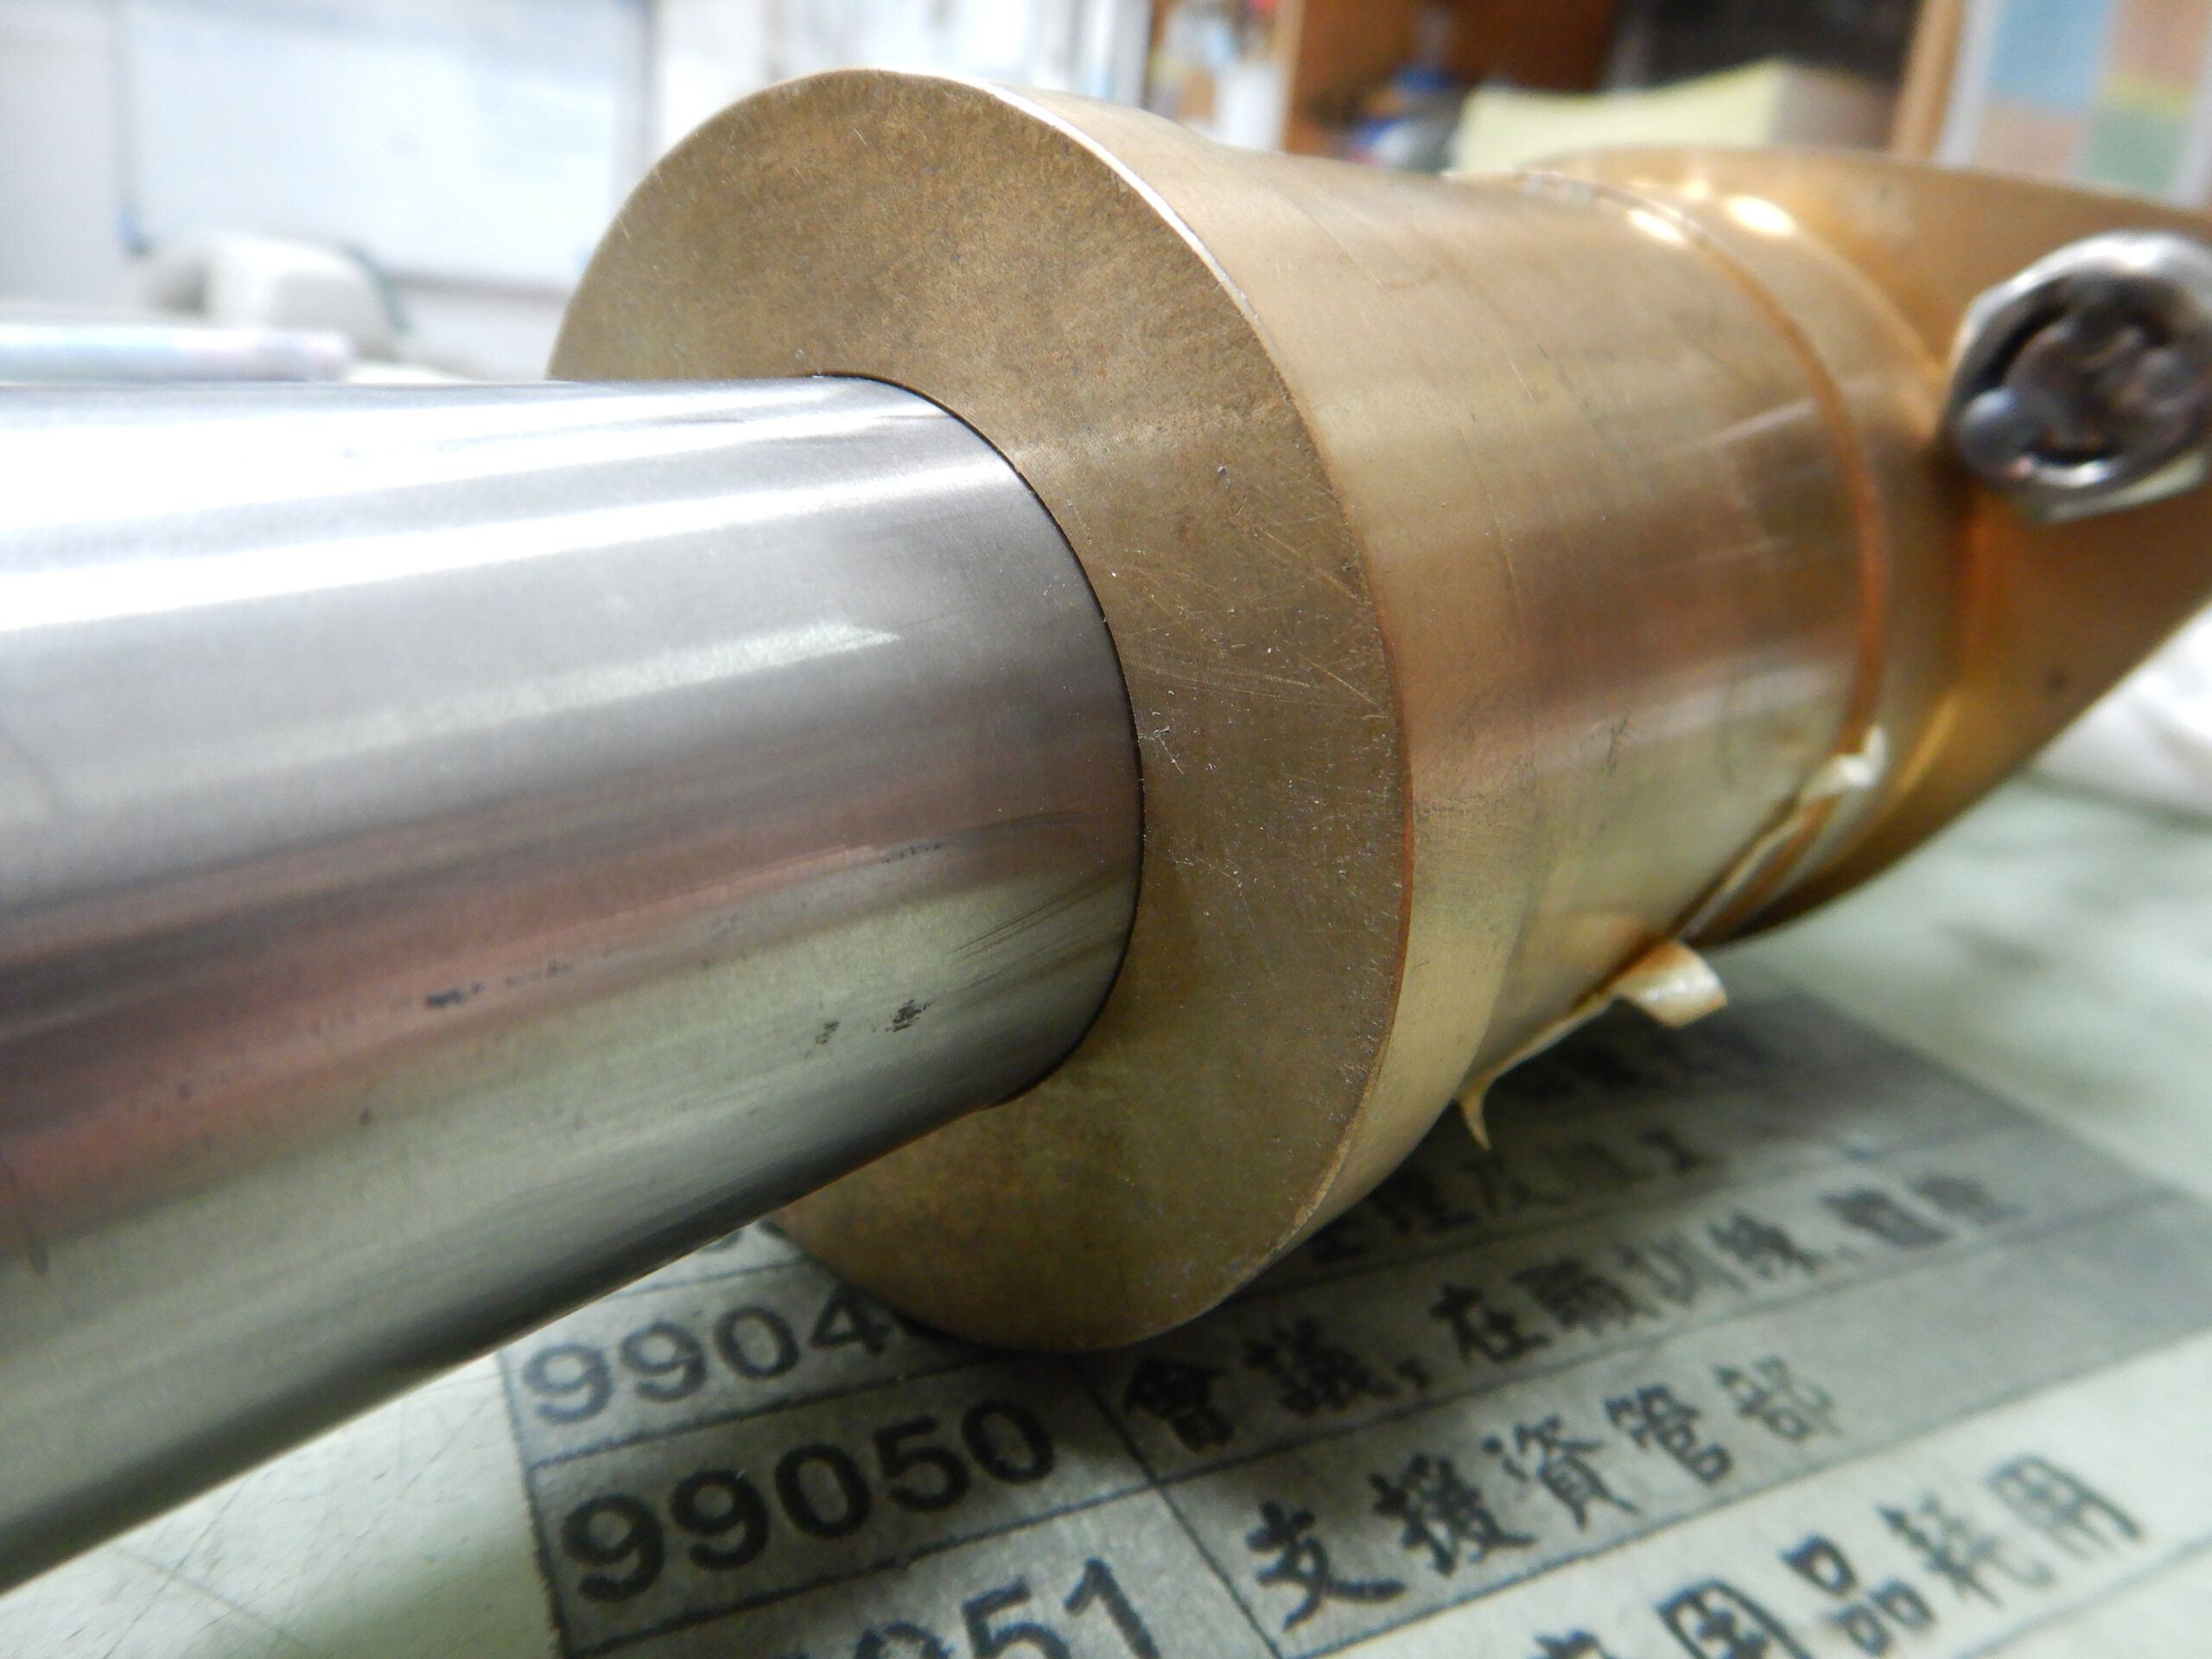
The stainless steel studs used on some stuffing boxes can suffer from corrosion. In many case these can be cleaned, and the studs corrosion inhibited; if extreme, however, these should be replaced. Bronze studs, on the other hand, are virtually immune to this phenomenon.
Stuffing boxes are among the simplest and most archaic of marine components. The traditional design, the type that relies on rings of waxed flax packing material, has been around for hundreds of years, having first seen widespread use on the water pumps attached to Dutch windmills.

Dutch windmill water pumps were among the first to use stuffing boxes.
As simple and rugged as they are, however, they do require routine inspection and periodic maintenance in order to minimize the likelihood of failure, as these are nearly always a momentous, if not catastrophic event, and therefore worth avoiding at nearly any cost. The hole through which the propeller or rudder shaft passes, the shaft log, is necessarily large, often three inches or more in diameter for power vessels, smaller on sailing craft, and while much of it is taken up by the shaft, it still represents a potentially large avenue for water flow in the event of such a failure.

With additional plies, seen here, when compared to ordinary raw water hoses, proprietary stuffing box hose is especially rugged and twist resistant.
Although some stuffing boxes are rigidly mounted to the shaft log, where they serve as a pseudo shaft support, most ‘float’ via a length of flexible hose, which is retained to the log at one end, and the stuffing box at the other end, using hose clamps, typically two in each location.
Ensuring Reliability
The good news is the aforementioned failures are easily avoidable, and prevention begins with regular inspection. Stuffing boxes should be reviewed on a regular basis, including a daily cursory inspection and a more thorough inspection, using a mirror to look at the bottom half of the hose and clamps, on at least a monthly basis. Cracked or otherwise irregular hose calls for replacement, as do corroded clamps.
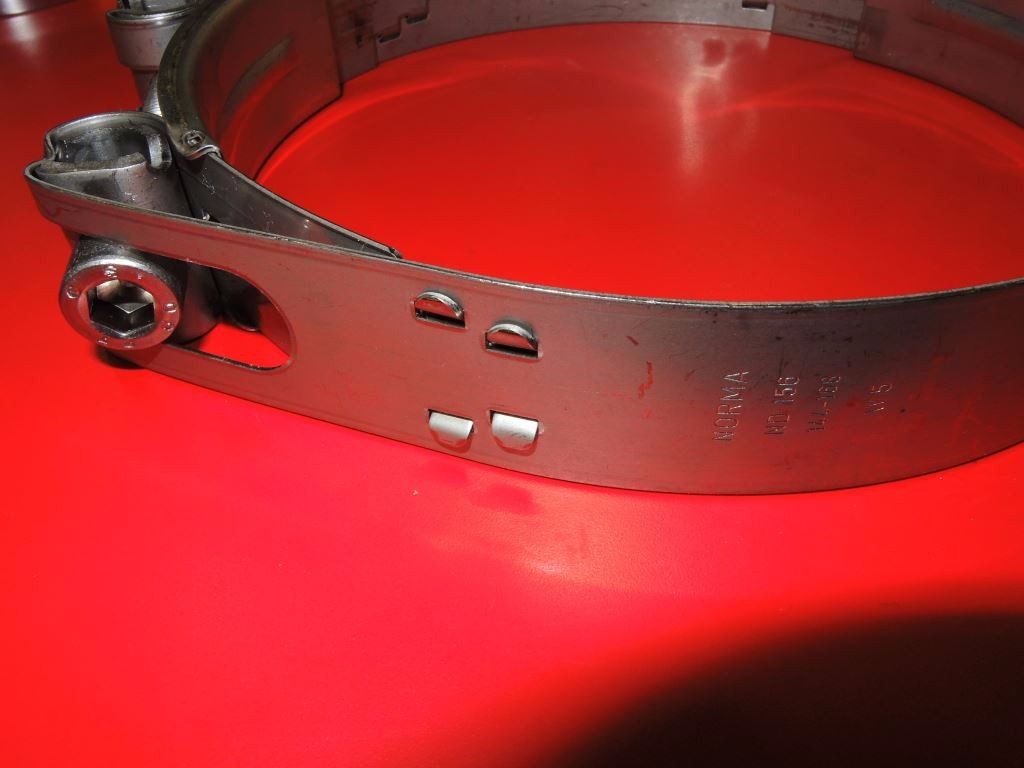
Because of their resistance to corrosion, interlocking, as opposed to spot welded, hose clamps are ideally suited for conventional stuffing box use.
Replacing clamps is straightforward and relatively easy. Replacements should be made from all 316 alloy stainless steel, including the screw, and their bands should be solid rather than perforated (for more on hose clamp selection and use see Marine Systems Excellence Hose Clamps Part 1 and Part II). For large diameter, heavy-walled hose, conventional band clamps may have difficulty imparting the necessary compression to effect a watertight seal. In those cases T-bolt clamps may be required. However, if T bolt clamps are used avoid the variety that relies on a folded, spot welded design, as these are susceptible to crevice corrosion.
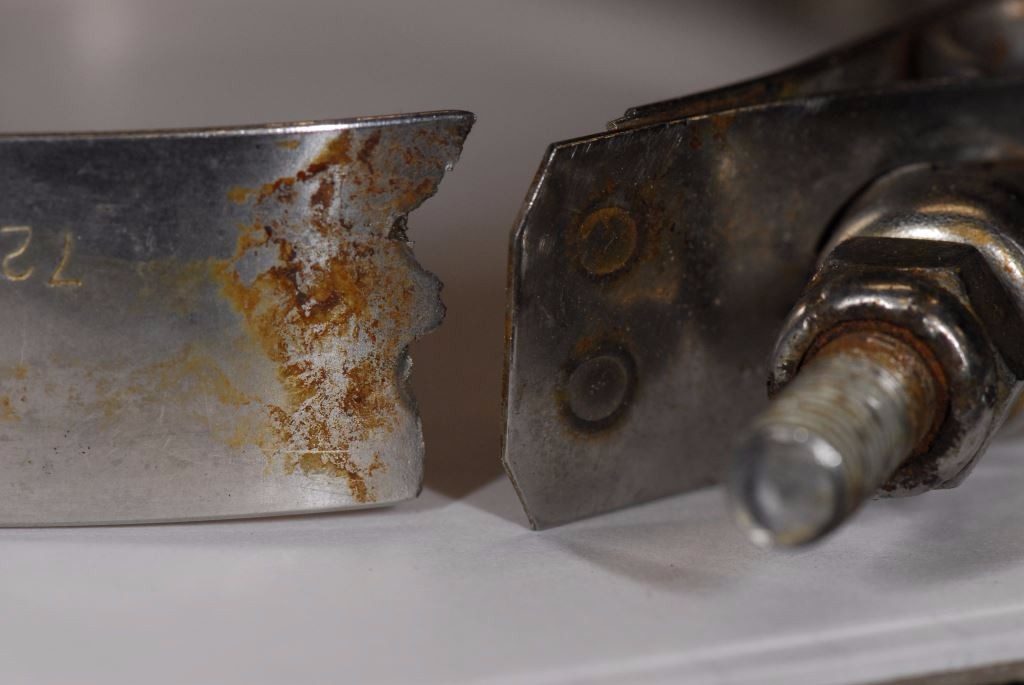
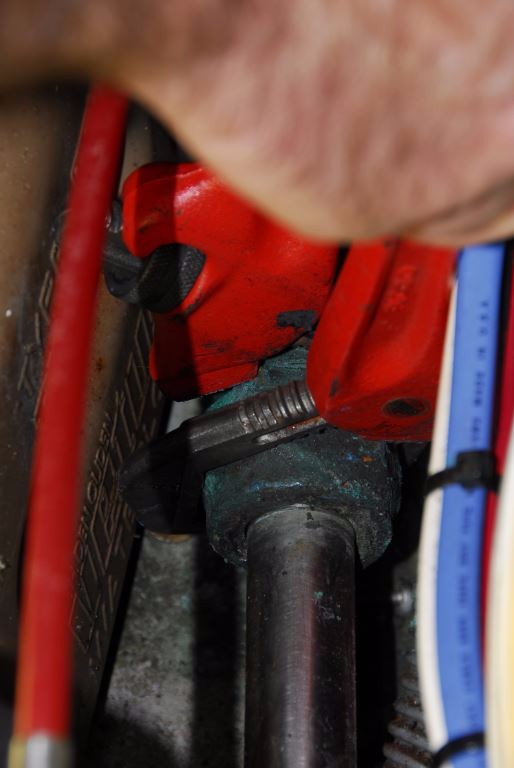
Folded, spot welded T bolt clamps are prone to crevice corrosion. The one shown here, used on a stuffing box, has parted; the fold was oriented along the bottom of the stuffing box hose.
Instead, use clamps that are mechanically interlocked rather than folded and welded. If the spot welded variety is used, ensure the fold is oriented at the top or 12:00 o’clock position on the hose, to prevent it from being continuously exposed to leaking water. Contrary to popular belief, there is no need to alternate fastener position on hose clamps.
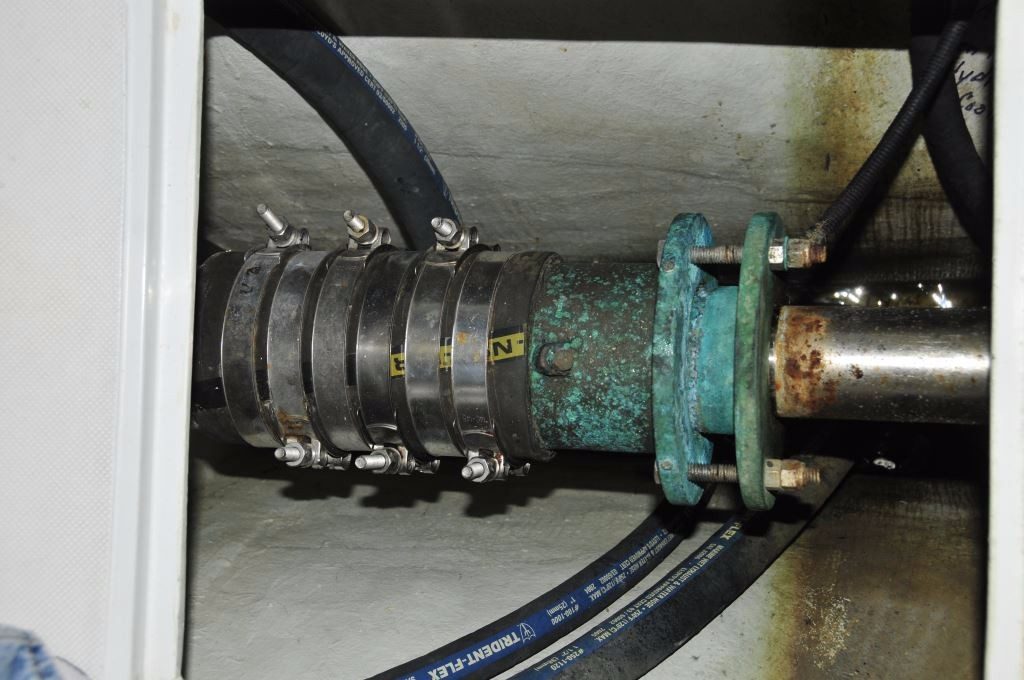
Perhaps this is a case of hose clamp overkill; the additional clamps are of no real value and could be detrimental if they aren’t located over the stuffing box or shaft log. Stuffing boxes should be equipped with double, high quality hose clamps at each end. Furthermore, too many clamps, combined with a hose that is too short, could prevent the stuffing box from “floating” on the shaft, and self-aligning.
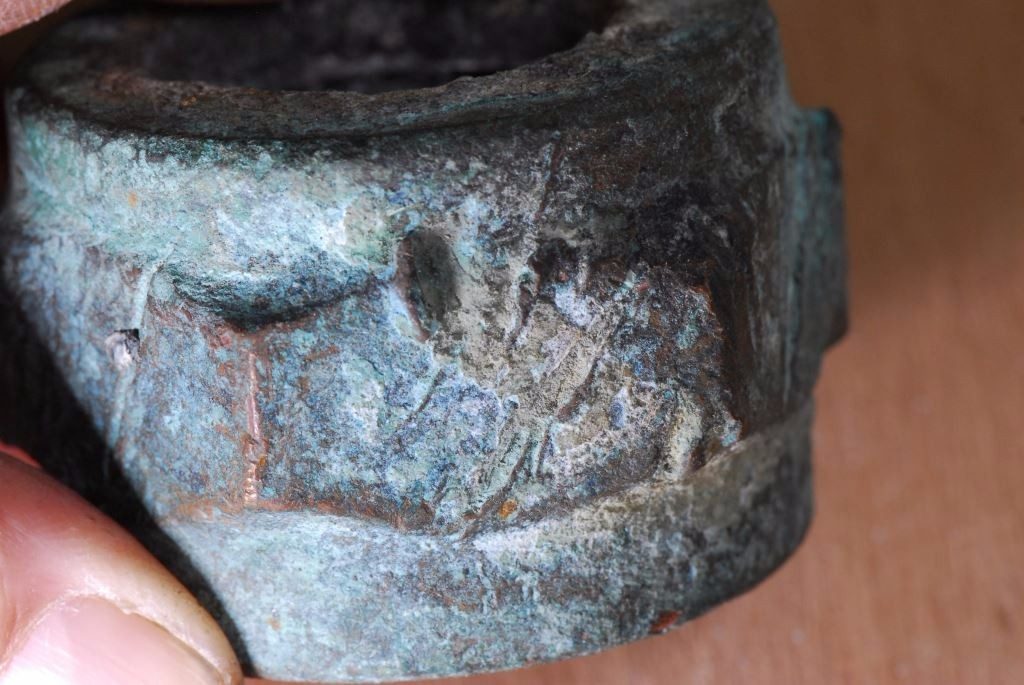
Bronze will nearly always develop a green patina, or verdigris; and stuffing boxes are no exception, this is a completely natural and harmless phenomenon. Heavy verdigris, however, can make disassembly and adjustment difficult. Periodically spraying the stuffing box with a corrosion inhibitor will reduce accumulation of this material and make service easier. For fiberglass vessels, in order to mitigate the effects of stray current corrosion, stuffing boxes should be connected to the vessel’s bonding system using a minimum of an 8AWG wire. Make certain the ring terminal is not located between the primary and lock nuts on the tie rod type stuffing box; nor should it be located between the hose and stuffing box body. The installation should utilize heat shrink tubing, conductive grease and corrosion inhibitor to maintain a low resistance and durable connection.
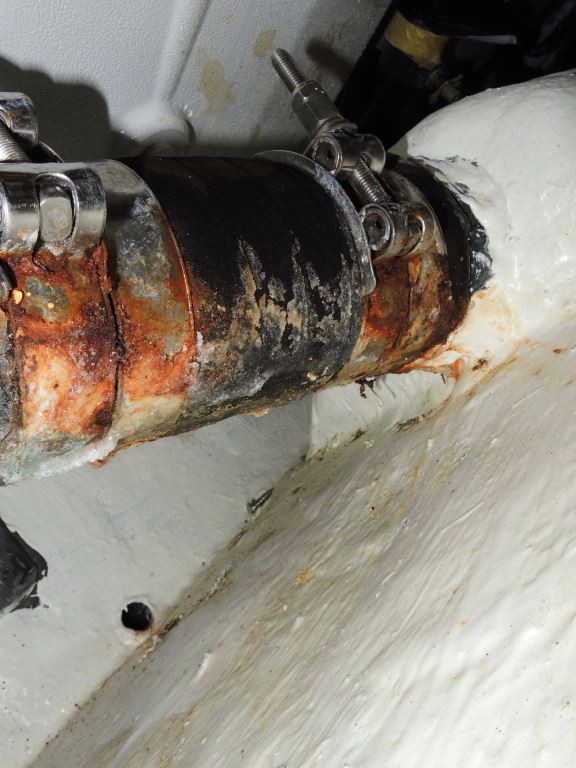
Chronically leaking stuffing boxes lead to more than just wet bilges. These clamps are seriously corroded as a result of regular exposure to seawater.
While it may look ordinary, the hose used with conventional stuffing boxes is, or should be, proprietary. Ordinary raw water or exhaust hose may utilize two or three plies, while proprietary stuffing box hose incorporates five plies. Because hose used in stuffing box applications lives an especially hard life, it’s submerged, vibrated and routinely twisted in forward and reverse, the added heft of five plies is a clear value added, and equates to longer life. Replacement of the stuffing box hose is invariably time consuming in that it requires separation of the propeller shaft from the transmission coupling. It is also, therefore, a task that must be carried out while the vessel is hauled. Conventional, conservative wisdom dictates that stuffing box hoses should be preemptively replaced approximately every five to seven years or when warranted by visible hose deterioration. One critical issue involves hose length, or more importantly, the length of “free hose” between the stuffing box pipe to hose adapter and the shaft log. This free hose length must be long enough to allow the hose to float freely on the shaft, avoiding side-loading, binding, and the overheating it can cause.
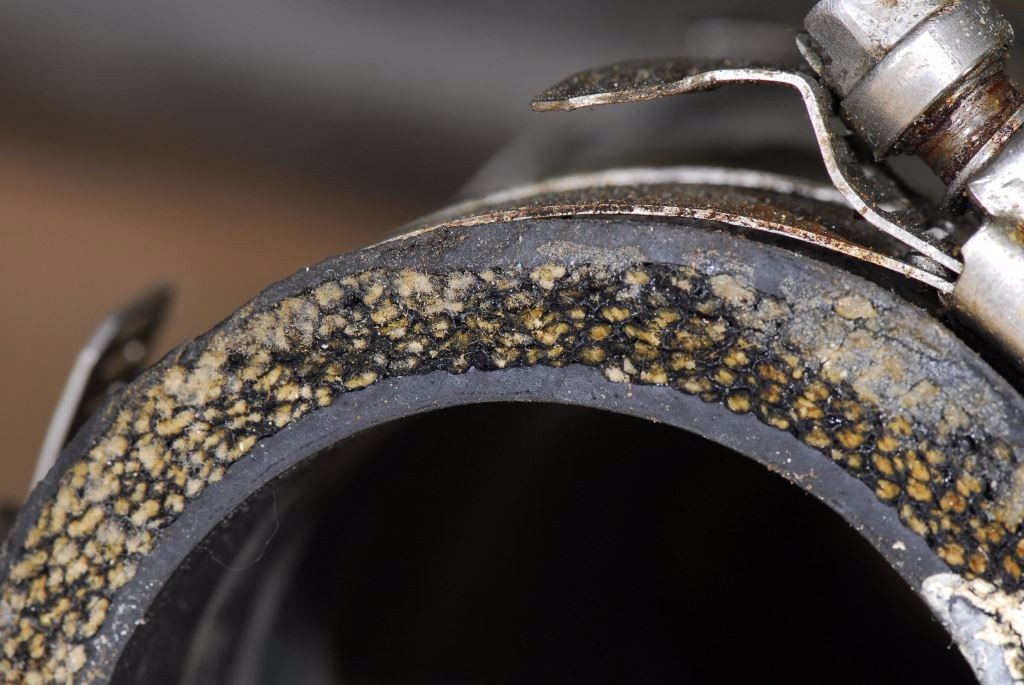
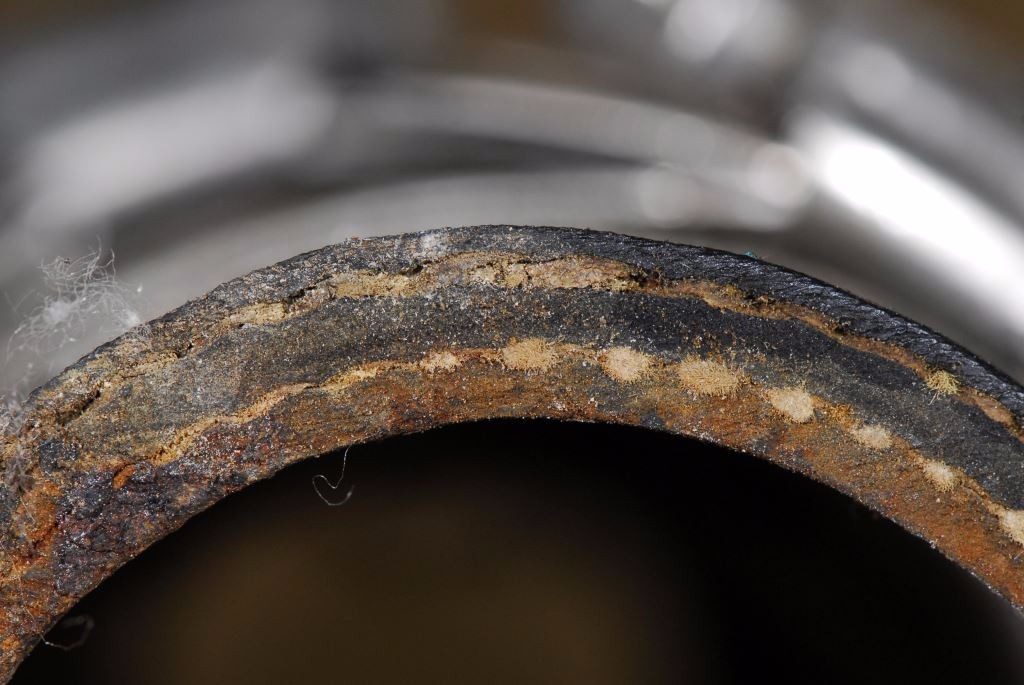
The five plies of a stuffing box hose (top) are clear to see, compared to ordinary hose’s three plies (above).
Service
Repacking and adjusting a conventional stuffing box is a task that intimidates many, however, this shouldn’t be the case. With the right instruction and tools, and a little practice it’s well within the reach of most handy do it yourselfers.
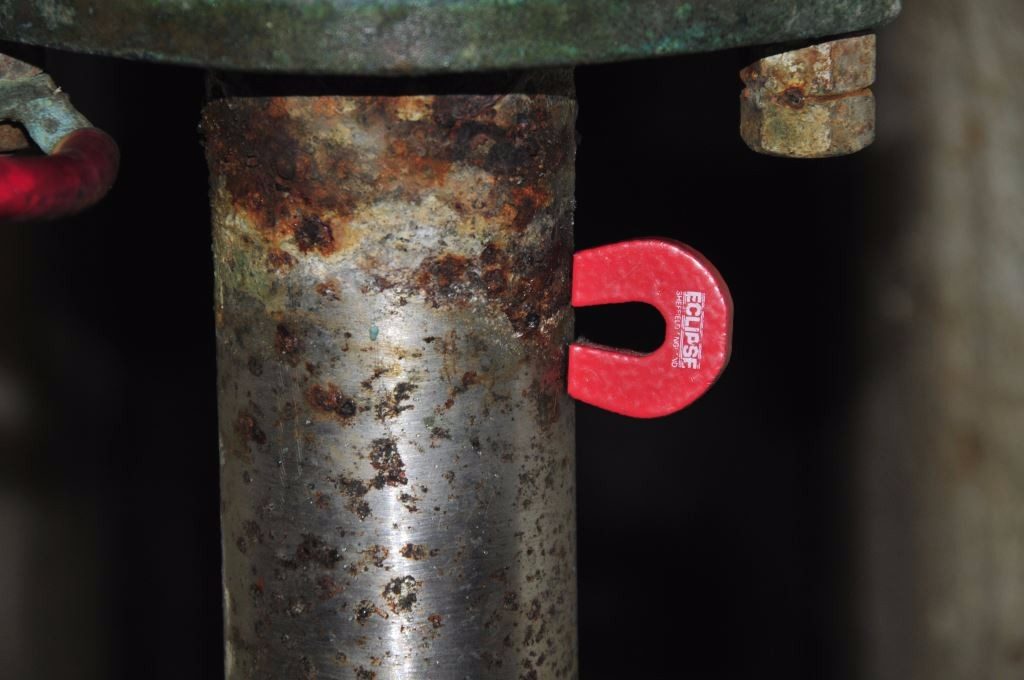
When stuffing boxes leak chronically, even after repacking, there’s usually a reason. In many cases it’s the result of a pitted shaft (above), which chews into the packing material with each revolution. With a few exceptions, when shafts are magnetic (top), they are also more prone to this sort of corrosion.
Traditional waxed flax packing material is readily available in a variety of diameters. With few exceptions, these are specifically matched to the shaft diameter, a two inch shaft, for instance, utilizes 3/8” packing while an inch and a half shaft utilizes ¼” packing. Therefore, if you know your shaft diameter, obtaining the correct size packing is, with few exceptions, straightforward. Some stuffing boxes used on Far Eastern-built vessels may deviate from this otherwise common protocol. In those cases, and in the absence of reliable information from the vessel or stuffing box manufacturer, look for packing that slips into and completely fills the gap between the shaft and inside diameter of the stuffing box or packing nut.
This packing nut has been loosened, and/or tightened using a chisel, damaging the nut’s flats. This practice should be avoided, particularly when tightening. Proper, smooth jaw wrenches should always be used.
Modern variations on the traditional waxed flax packing include Teflon and Gore-Tex, as well as graphite-based packing. While these packing variants tend to be more slippery and longer lasting than flax, they can in some cases work too well. That is, they may not allow enough water to pass, especially if improperly adjusted, which leads to stuffing box overheating and excessive shaft wear. As for packing using graphite, there is yet another caveat; graphite is both slippery and a highly noble metal, which means that when it comes in contact with almost any other metal, a stainless steel alloy shaft for instance, and the two are immersed in an electrolyte, such as seawater, the shaft will be anodic, i.e. it will be prone to corrosion. High tech packing materials should, therefore, be used with caution and monitored closely after the initial installation. In some cases, a hybrid arrangement of conventional and high tech packing materials may provide the best results.
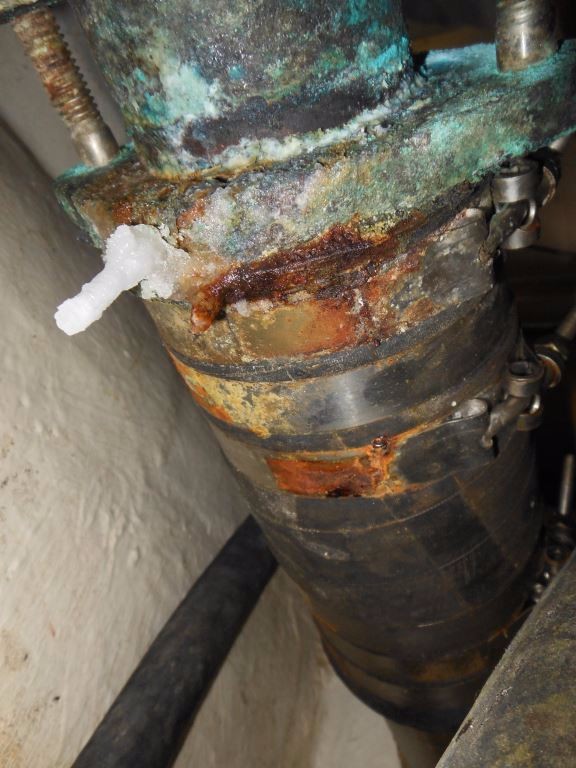
This salt stalactite tells a story, this stuffing box is almost certainly leaking too much. Anything more than that which is required to keep a stuffing box cool is simply leakage.
The watch phrase when repacking a stuffing box, regardless of the material, is careful monitoring for the first few hours of operation. Using an infra-red pyrometer, the stuffing box temperature should be monitored during this time, shooting the stuffing box and not the shaft (highly reflective surfaces such as shafts and hose clamps will often give erroneous readings); adjustments should be made if necessary. No part of the stuffing box should exceed more than 30°F-40°F above ambient seawater temperature, regardless of drip rate, while at any speed. In fact, with access to an infrared pyrometer, drip rates are much less important than they once were. 
Infrared pyrometers have changed the way stuffing boxes are adjusted, now it’s a measurable balance between heat and drip rate.
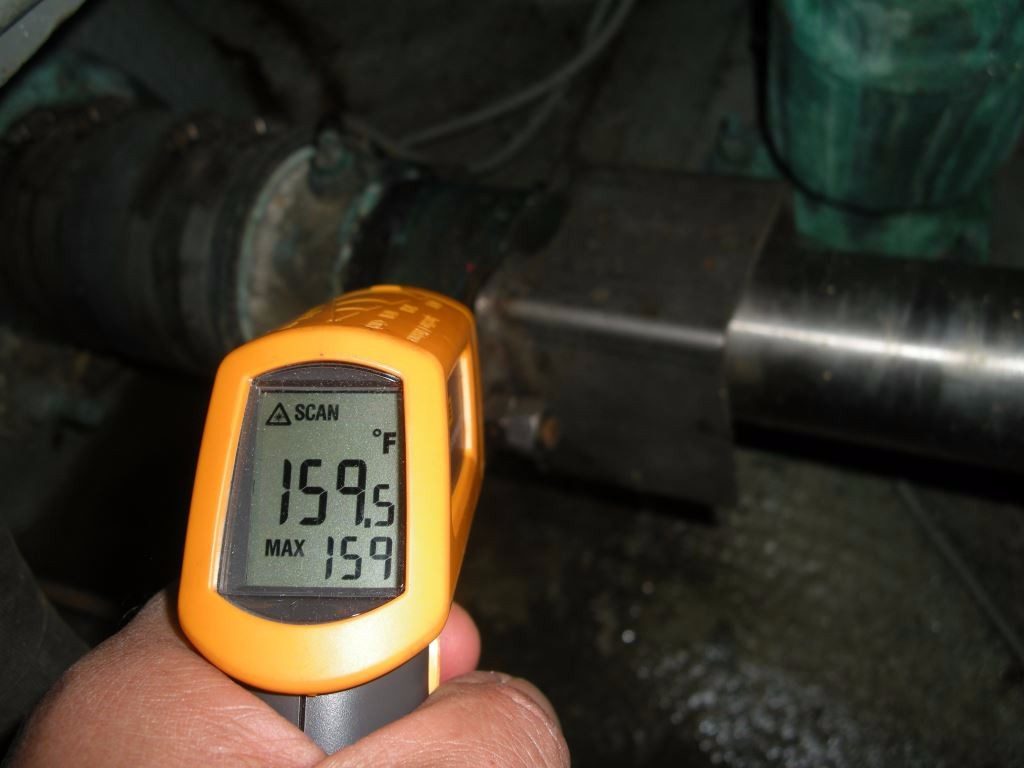
Stuffing box temperature should not exceed that of the water in which the vessel is operating by more than 30°F-40°F. The one shown here is clearly starved for water and is overheating.

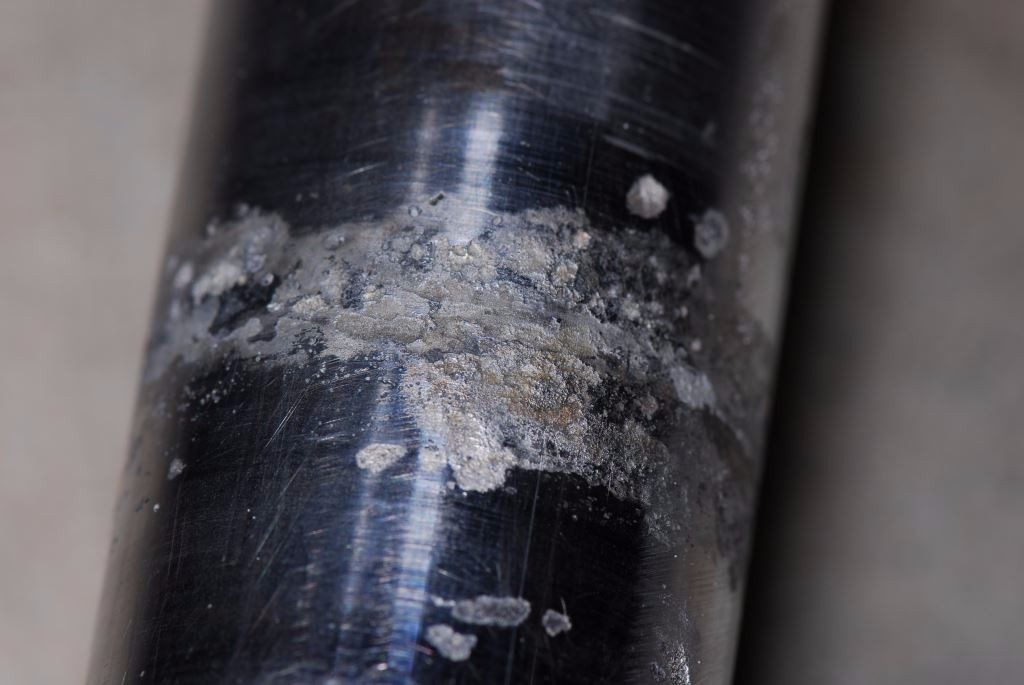
A stuffing box that is side loaded, from overly stiff hose, or a shaft that is not centered in the shaft log, or one whose clearance is inadequate (see images below), can suffer extreme wear, the result of which is a ‘bronze slurry’, like that shown here.

Clearance between the outside diameter of the shaft and the inside diameter of the stuffing box is critical, too much and packing will be pushed into the gap, limiting its effectiveness, too little and water flow is impeded, which can lead to overheating. One rule of thumb calls for 0.005″ clearance, plus and additional 0.005″ for every inch of shaft diameter. Thus, a 3″ diameter shaft would have 0.020″ of clearance.
Repacking Procedure
Ideally, repacking the stuffing box should take place preemptively rather than waiting for failure. Taking this approach means the task can be carried out while the vessel is hauled for seasonal storage or bottom painting, although if necessary it can be accomplished while afloat. While the frequency with which repacking takes place varies, one thing is certain, if, because of chronic leakage, the stuffing box requires repacking on a frequent basis, then it’s an indication of another problem, likely an issue with the shaft’s surface, it may be corroded, water flow may be impeded, or the packing installation or adjustment technique may be flawed. If, however, the packing has served well for an extended period, and is simply worn out, and needs to be replaced, the procedure is as follows. There are a few different types of conventional stuffing boxes; however, they primarily fall into two categories, the carrier nut variety, and the twin tie rod type. Both work the same way, however, compressing packing into a void and against the shaft and stuffing box body.
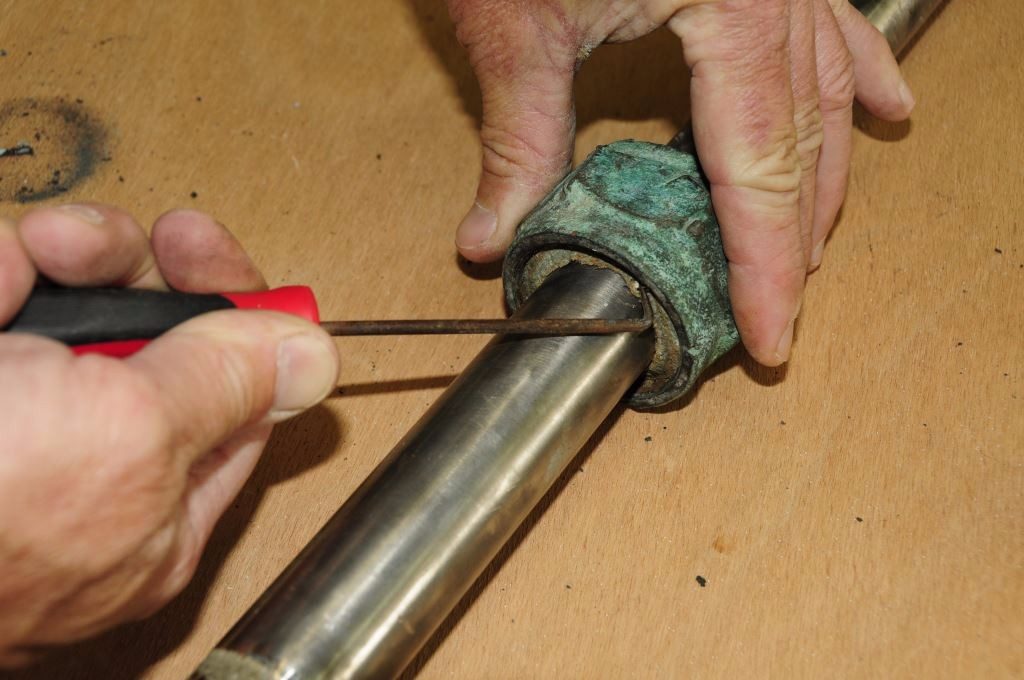
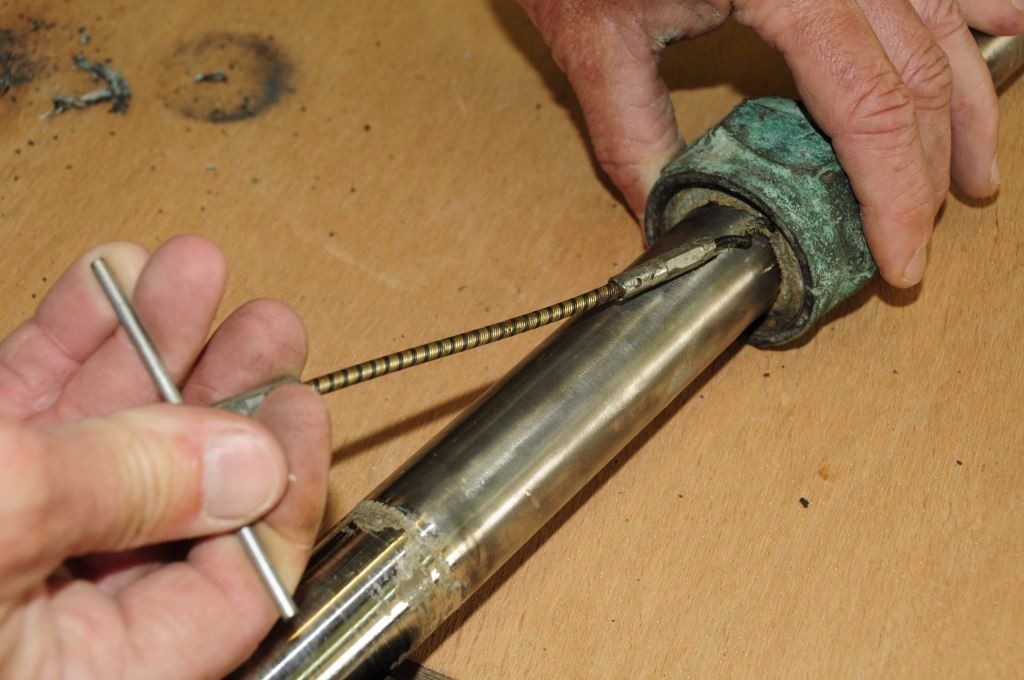
Depending on access, and stuffing box design, removal of the old packing can be challenging. Here a cork-screw like packing removal tool(above), as well as a pick (top), are being used.
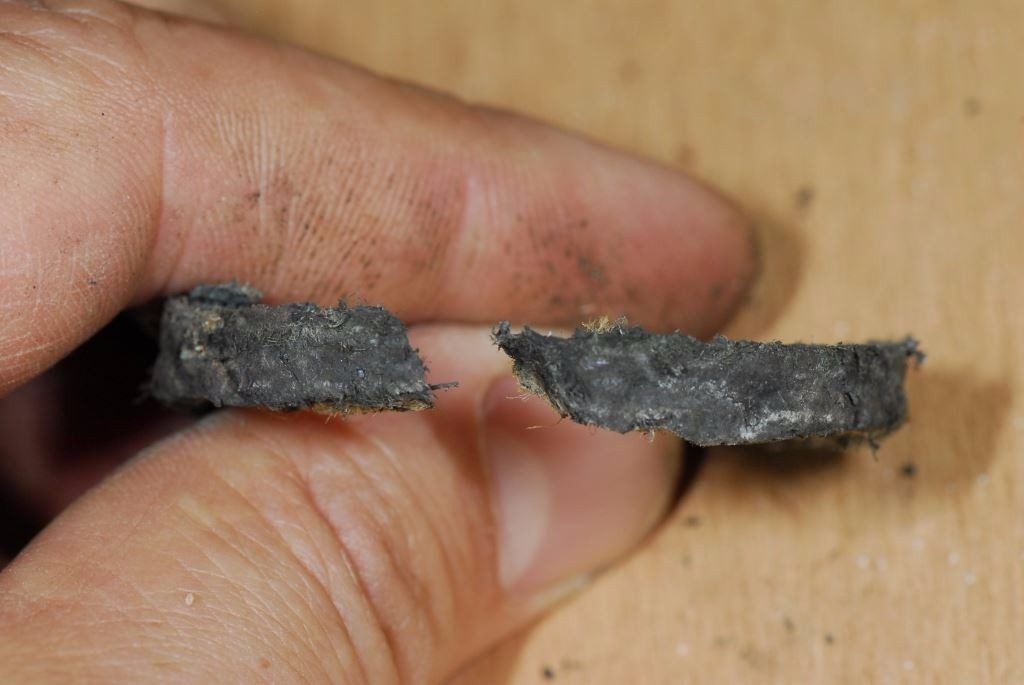
Begin by loosening the locking nut(s) and back off the packing carrier nut or tie rod ram. Remove all of the old packing. You can use a pick or a proprietary packing removal tool; it looks a bit like a flexible corkscrew. It’s important that all old packing and debris be removed, if you have access to compressed then use it to blow this area out (wear safety glasses). If green and crusty, the threads on the stuffing box body should be cleaned with a non-metallic bristle brush or 3M ScotchBrite pad, and penetrating oil, and then lightly lubricated with oil. If they are tie rods and of the stainless steel variety and are discolored or lightly corroded, they too should be cleaned in the same manner; if heavily corroded they should be replaced.
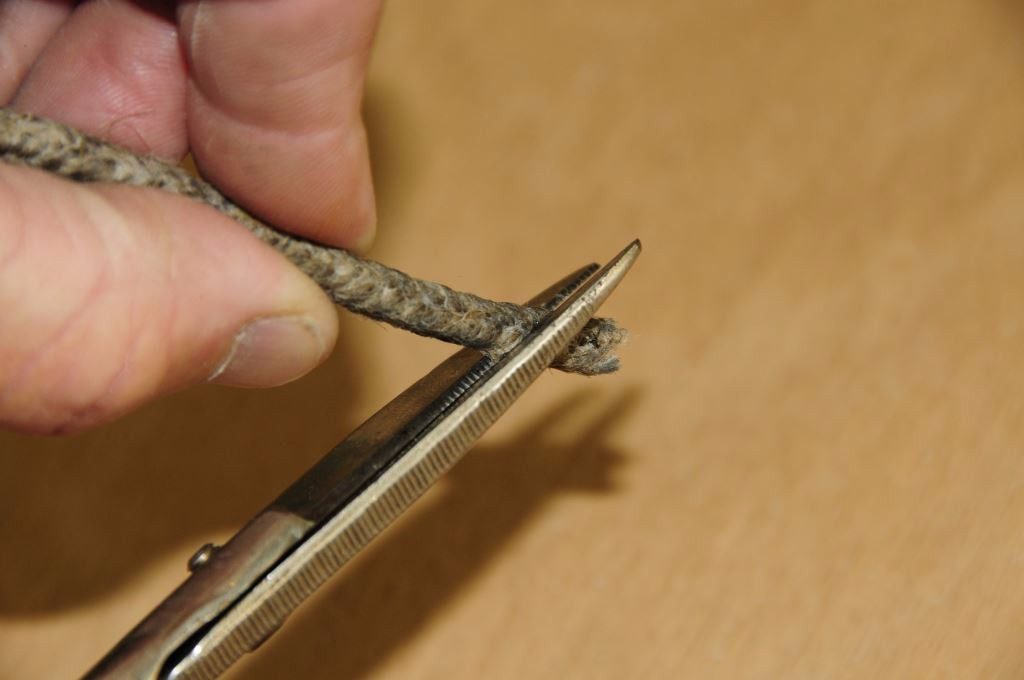
Packing should be cut at a 45° angle to provide a leak-resistant lap joint.
Unless instructed otherwise by the stuffing box manufacturer, three new rings of packing material should be cut, their inside diameter matching exactly the outside diameter of the shaft; the ends of each piece of packing should be cut on a forty-five degree angle so they mate in an overlapping fashion. I find it helpful to apply a coating of high viscosity grease (I prefer Lubrimatic’s green Trailer Wheel Bearing Grease; and adding a stainless steel or Monel (never ordinary steel) grease or Zerk fitting to a stuffing box will allow you to inject grease any time, especially when leaving the boat, which will reduce dripping, potentially to zero) to the packing sections as I install them, this acts as a lubricant and it helps keep the sections in place as they are inserted into the stuffing box recess or nut carrier. These joints should be spaced 120° apart, or at the 12, 4 and 8 o’clock position.
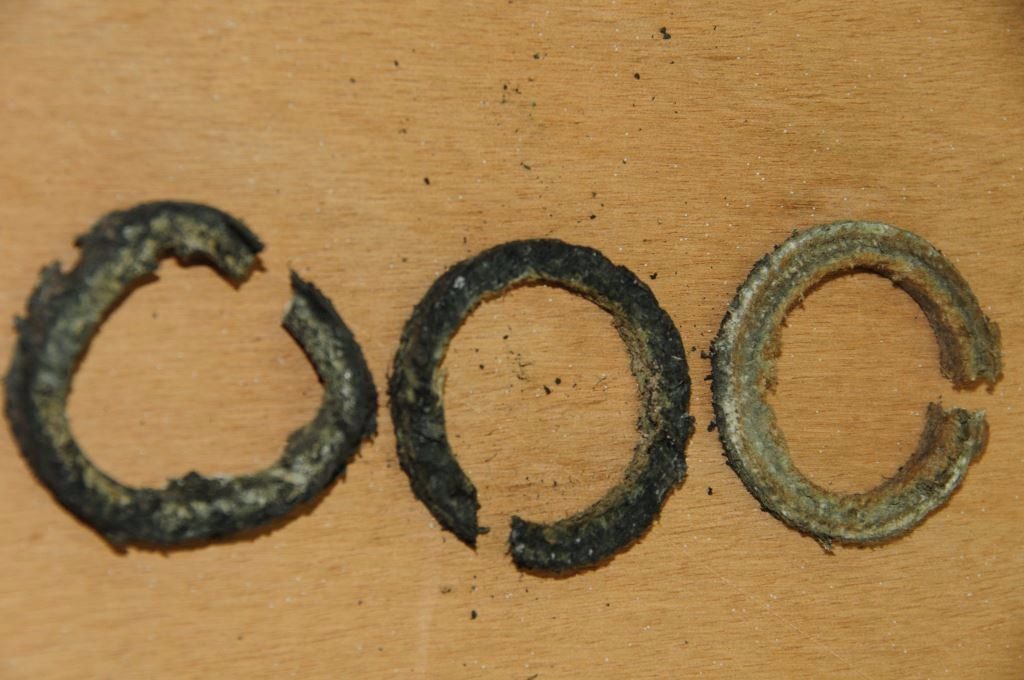
Most stuffing boxes are designed to accept three rings of packing. The joints should be oriented 120° apart from each other.
The packing nut should be made snug, not much more than hand tight initially. How tight is a subjective measure, however, it doesn’t matter because it will likely be adjusted once the vessel is launched and the engine run. Initially, it is far better for it to be too loose than too tight. It’s critically important that the locking nut(s) be tightened against the packing nut using two wrenches, i.e. they need to be tightened to create tension against each other. Tightening one, and then the other, using one wrench, is inadequate and may lead to a loosening and flooding.
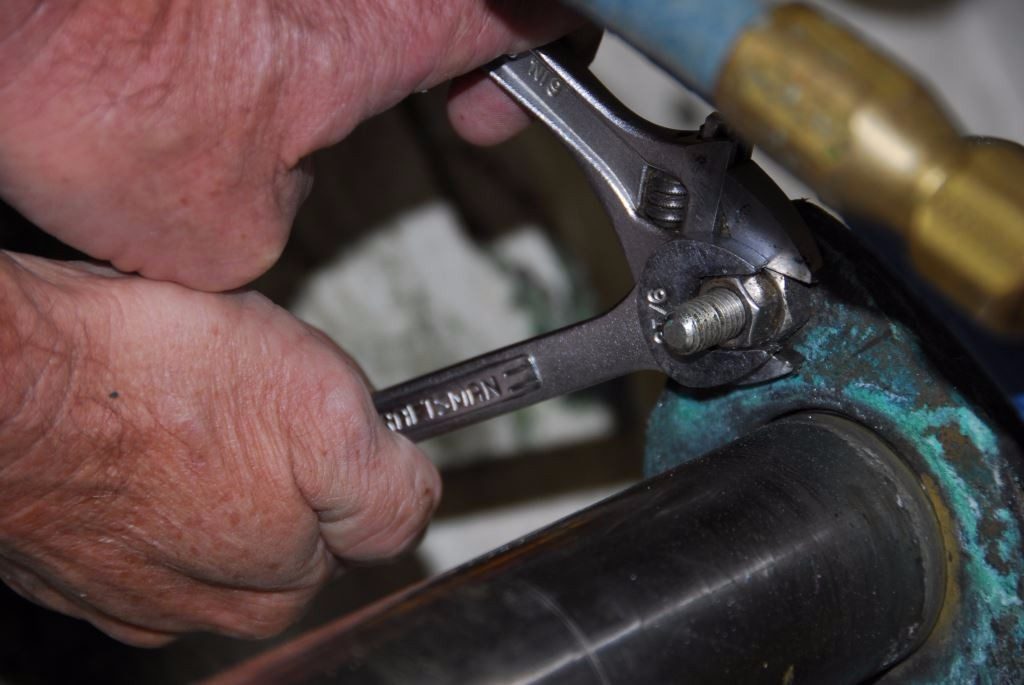
Two wrenches must be used when tightening twin packing lock nuts, to ensure adequate tension is developed between the two nuts. The style shown at the top should be avoided where access is poor. The adjustment method shown above, using twin studs, is better suited to limited access locations. If Nyloc rather than double nuts are used, loosening is virtually eliminated and adjustment can be accomplished with a single wrench.
At launching and while underway check for leakage, which to a small degree is normal. The vessel should be slowly run up to cruising speed, roughly three fourths of wide open throttle, all the while monitoring stuffing box temperature and water flow/leakage, and operated there for fifteen minutes. If all is well, run up to full throttle for approximately five minutes, again while monitoring stuffing box temperature.
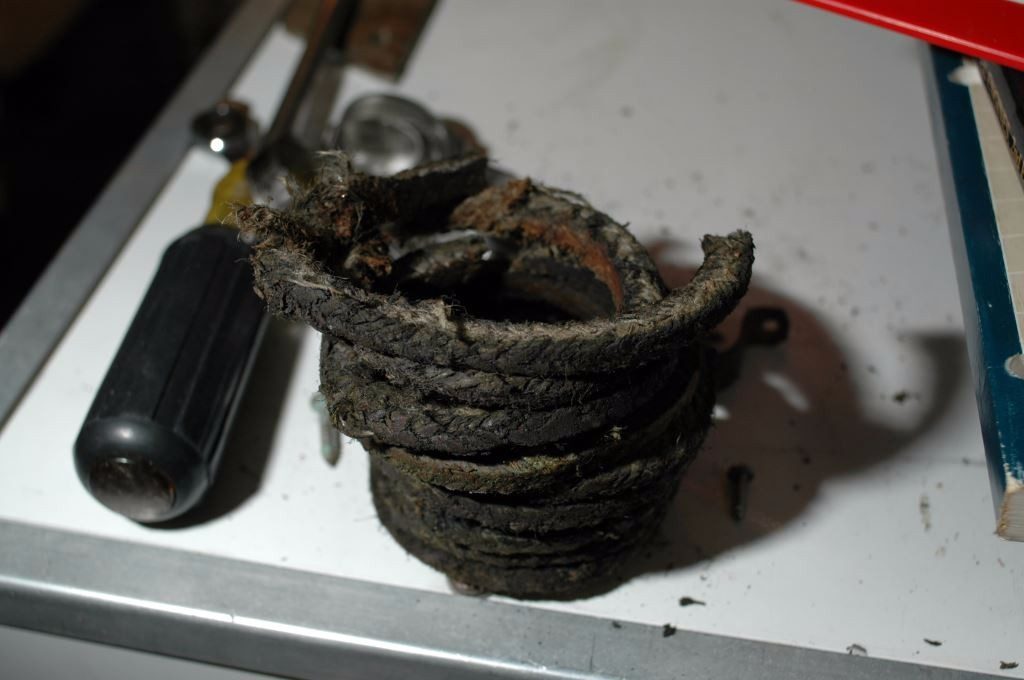
Too much of a good thing; if three wraps don’t stem the flow, another problem is almost certainly present. The stuffing box from which this packing came was clearly over-stuffed.
Ultimately, the arbiter of correct stuffing box adjustment is temperature rather than drips per minute. Once properly adjusted, the stuffing box should leak little and be no hotter than about 30°F-40°F above ambient water temperature. If it is over tightened the wax in the packing will melt and run out of the stuffing box as a liquid, often accumulating under the stuffing box as a greenish pyramid, after which it will leak copiously. If necessary, this entire procedure can be carried out while the vessel is afloat. Once the packing nut is removed simply secure several wraps of a rag around the stuffing box where the shaft exits to temporarily stem the flow of water. Water will leak during reassembly; however, provided you work quickly it will be comparatively little. Check your stuffing box regularly and provide it with the care it needs. Doing so will yield the dividends in both longevity and reliability.
Next month I’ll delve into the intricacies of dripless stuffing boxes.

