
Text and photos by Steve D’Antonio
Copyright © 2017 Steve D’Antonio Marine Consulting, Inc.
From the Masthead
I recently encountered a question, posed by a participant in an online boat owner’s forum, which caught my attention. “I’m preparing to take delivery on a new vessel”, the forum member said, “and I’m wondering what others think about having it surveyed”. I waited for a few days before responding, I was curious to see what others had to say. Much to my surprise there were only a couple of brief responses.
I encounter this question fairly often. In short, I strongly recommend that both new and pre-owned vessels undergo a full inspection prior to a would-be owner taking possession.
A boat is a complex product, with all the systems found in a modern home, heating and air conditioning, potable water, sanitation, entertainment etc, as well as those required to be independent of land, and to propel it safely and reliably in a variety of conditions. Getting it right is a tall order, and because of this complexity, as well as constant changes and improvements in both equipment, and within industry standards that relate to proper installation of marine systems, no two new vessels from a manufacturer are ever exactly the same, especially those built for cruising; making consistency and the value of repetitive construction, an elusive target for even the most conscientious builders. In many cases, the issues I uncover in a new vessel inspection are entirely unknown to the builder, and the reputable ones are only too happy to make corrections, in an effort to maintain the customer’s confidence and satisfaction, as well as to improve their product. Ideally, as a buyer of a new vessel, the pre-acceptance inspection should be written into the initial purchase contract. Builders and dealers, again the reputable ones, are almost certainly prepared for this. If they balk, it’s a red flag to be sure.
A pre-acceptance inspection for new vessels allows you to insure that the boat meets the safety, reliability, comfort and ease of maintenance requirements that you expect from the builder, and may have contracted for, along with any other standards to which the builder claims to adhere to, including and especially those set forth by the American Boat and Yacht Council. Again, these expectations should be included in the build/purchase contract. Furthermore, pre-acceptance is when you, the buyer have the greatest leverage for encouraging a builder or dealer to correct defects, flaws or oversights in the agreed upon equipage. In my experience, once you’ve taken possession, the builder or dealer has less incentive, or at least there is less of a sense of urgency, to make corrections. In some cases it also makes sense to have the vessel inspected prior to the expiration of the warranty period.
This month’s eMagazine feature article covers the subject of coolant recovery bottles. I hope you find it both interesting and useful.
The Benefits of Coolant Recovery Bottles
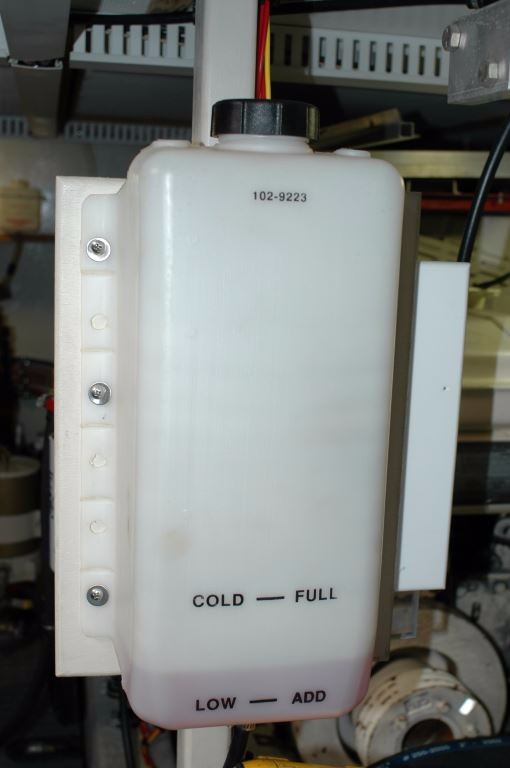
Coolant recovery bottles are available in a range of shapes and sizes. Bottle selection is driven by the overall volume of the cooling system, larger systems require larger bottles.
Most boat owners, even those with limited technical abilities, know that the cooling system on their engine and generator operates under some level of pressure, and most also know it’s a potential safety issue as the pressure cap, much like the one on an automobile, cannot be opened when the system is hot. However, have you ever thought about why that’s the case, what advantage does a pressurized system offer? In some ways it seems counter-intuitive, pressurizing this system makes leaks more likely. While that’s true, it’s worth the risk as you will see in a moment.
Pressure Caps, Pressurized Systems and Expansion Tanks
The cap itself is worthy of some discussion, it’s outward simplicity belies its complex inner workings, which typically incorporate two calibrated springs as well as two gaskets and a check valve. The primary spring controls the pressure at which relief will occur, i.e. when coolant will be allowed to leave the engine’s expansion tank, the assembly on which the cap is typically mounted (although some systems have remote expansion tanks). The second spring regulates the check valve operation. As the engine heats up so too does the coolant; the latter expands and must be given route to do so, typically into a recovery bottle, but sometimes into the bilge under the engine.
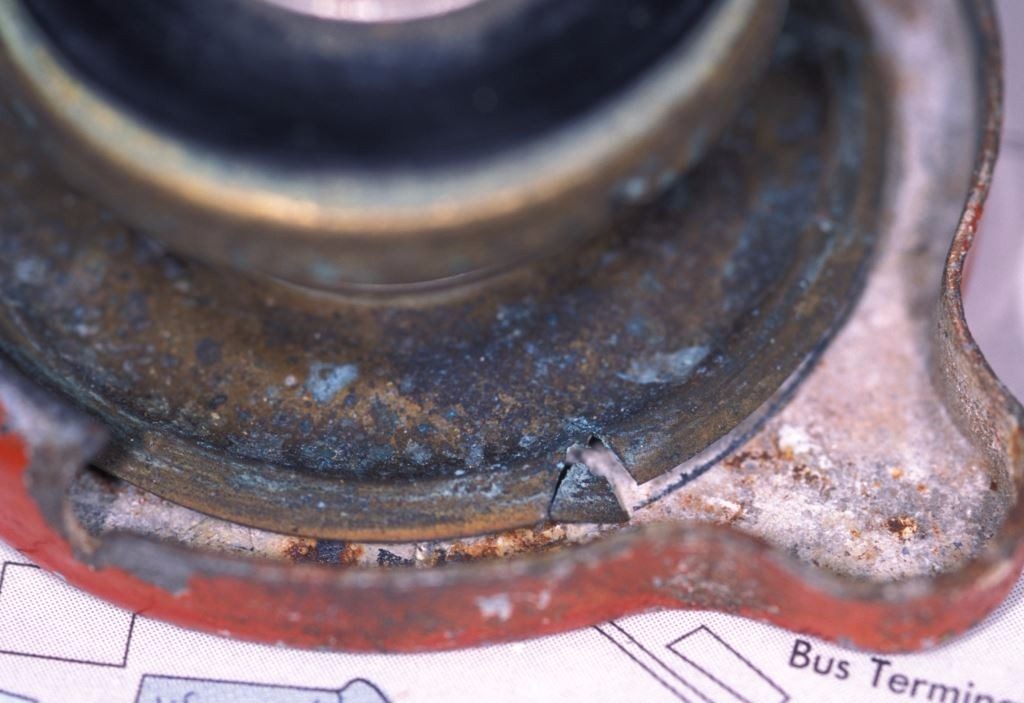
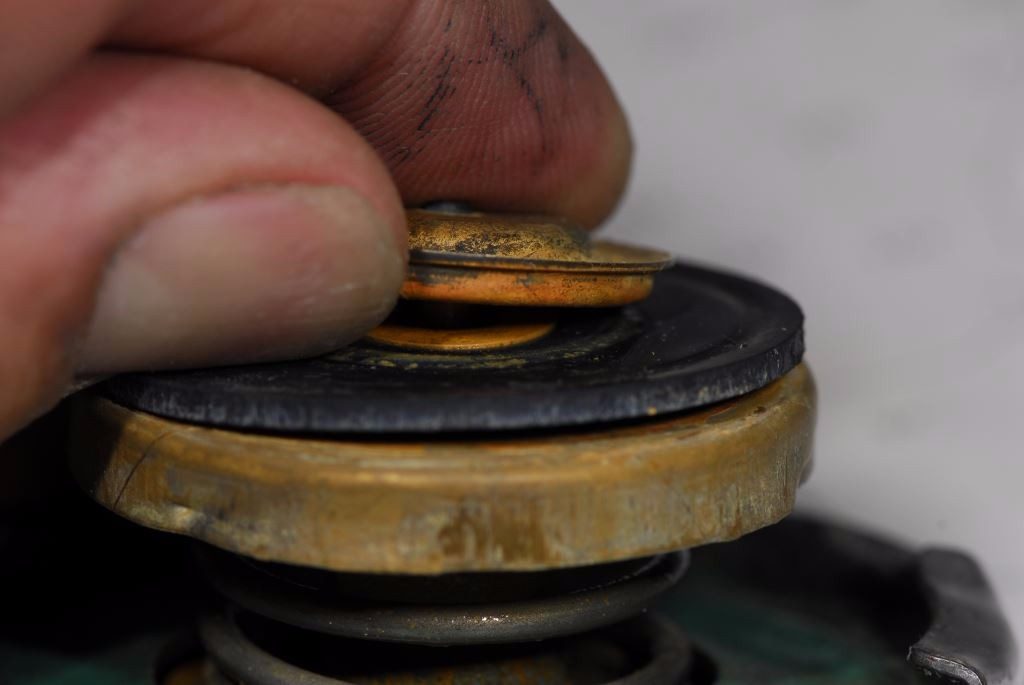
Not all cooling system pressure caps are alike. Those with a brass upper bushing are not designed to be used with recovery bottles; and the bushings, like the one shown here, are prone to cracking.
Cooling system caps are often rated for pressure of somewhere between six and fifteen pounds per square inch (41 and 103 kilo-Pascals) and this rating is nearly always embossed on the cap. The pressure rating is designated by the engine manufacturer and replacement caps must never deviate from this specification.

Pressure caps carry pressure ratings, which are nearly always embossed on their surface. Using a cap that carries the proper pressure rating is critically important; if it’s too high it can lead to leaks, if it’s too low it may not provide proper boil and cavitation protection.
The cooling system’s gaskets, pump seals and hoses are specifically designed to operate at a given pressure, exceeding it can lead to failures of these components and leaks. The cap gaskets serve several purposes, they keep coolant from leaking out of the system, they maintain pressure and, if equipped with one, they allow coolant, and not air, to be drawn back into the system from the coolant recovery bottle.
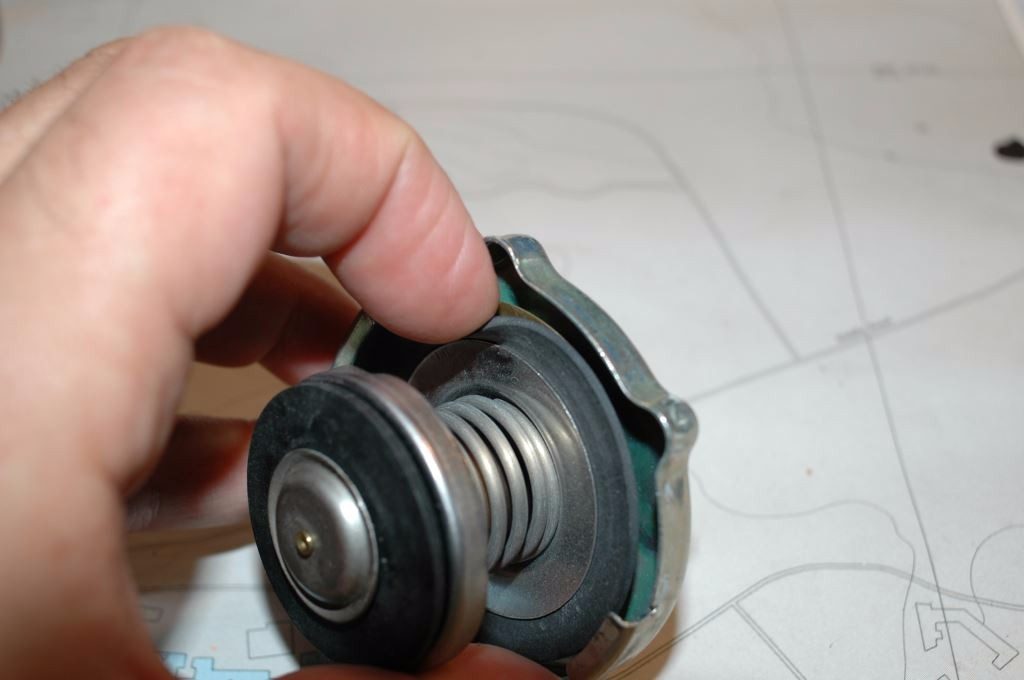
Pressure caps are comprised of several parts, including gaskets, springs and a check valve, all of which must be in good working order for the coolant recovery bottle system to work properly.
There are several reasons why a cooling system benefits from pressurization (look for an upcoming article on the subject of cooling system cavitation erosion, where more of these issues will be covered in greater detail). For the purposes of this discussion, the primary reason for operating under pressure is to increase the boiling point of the coolant and thus the efficiency of the cooling system. For every pound of pressure that the system operates under, the boiling point (of water) is raised three degrees Fahrenheit. Therefore, a fifteen pound pressure cap raises the boiling point 45°F, affording an additional margin against boiling and overheating.
Recovery Bottles
The coolant recovery bottle’s primary purpose is to capture expanding coolant, as well as keeping the cooling system from ingesting air, which could lead to pump cavitation and overheating. Among the recovery bottle’s most valuable traits, however, is its ability to alert the user to trouble within the system. If, for instance, the level drops steadily over time, it’s an indication that coolant is leaking from the system, whether it’s visible under the engine or not, it’s being “consumed” from the bottle. Unlike crankcase oil, which may require periodic topping off, you should never have to add coolant to the system once it’s undergone the first few operating heating and cooling cycles. In larger systems, and those with keel coolers, it may take a few dozen cycles for stabilization to occur, however, coolant in the recovery bottle should not need to be replenished.
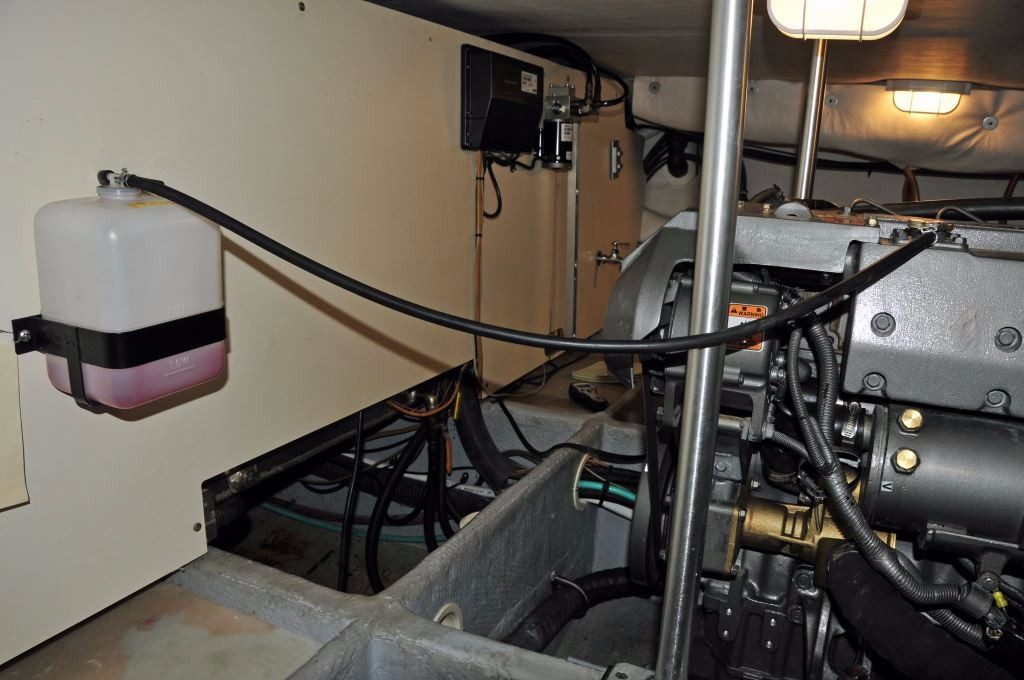
Coolant recovery bottle plumbing should be routed so that it is not in harm’s way, and so that it does not impede access around the engine. Most recovery bottles are plumbed from the bottom, however, some, like the one shown here use an internal pick up tube.
It comes as a surprise to many users that the bottle’s coolant level should fluctuate during an operating cycle, which is from cold start up, to full operating temperature and back to cold. That is, the level of coolant in the recovery bottle should rise as the engine reaches operating temperature. Once the engine is shut down and cools off, it should drop back to its original, starting level. Mark the cold level so you will immediately note an irregularity. If there is no movement, or if it drops below the starting level, it’s an indication of a problem. No movement often indicates a problem with the cap’s filler neck port, which is connected to the bottle via a hose; it sometimes becomes clogged with debris or it may be cracked. Or, the hose itself may be crushed or breached. In other cases, a lack of intra-heating cycle movement may indicate a defective pressure cap. Its internal mechanism and gaskets are somewhat delicate and can cease to retain a vacuum, which is necessary to draw coolant from the bottle to the expansion tank during the cool-off period.
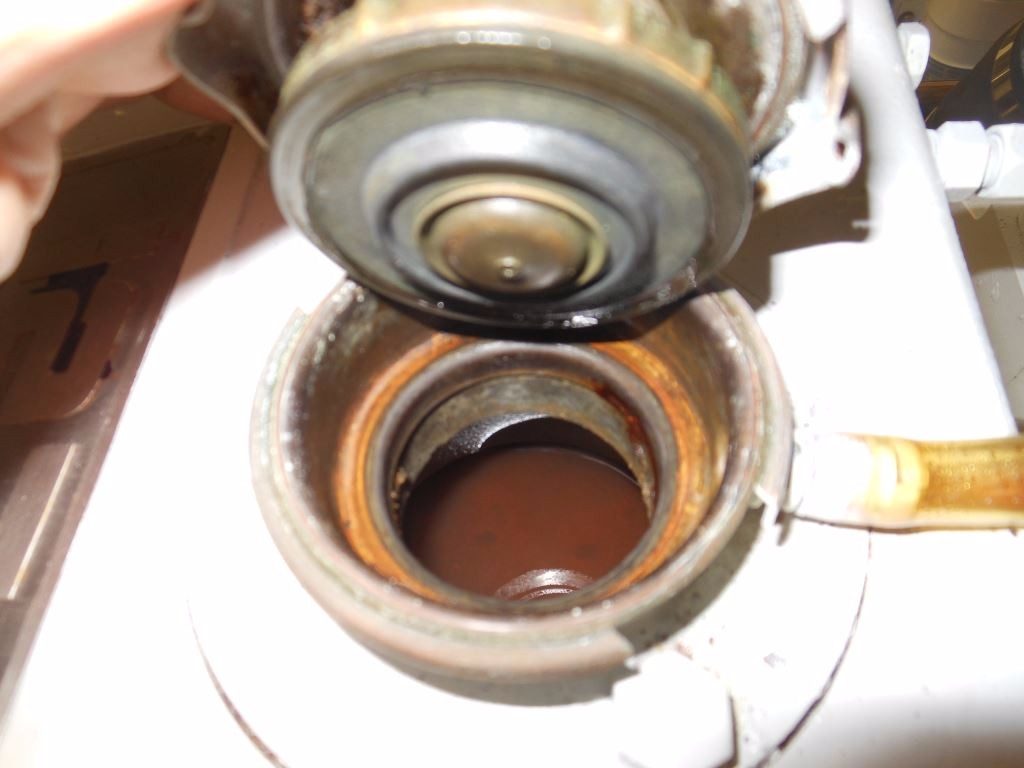
When the system is cool, remove and inspect the cap to ensure its gaskets are clean and free of tears or other damage. Inspect the filler neck as well for dents, corrosion, or cracks and to ensure the overflow port is clear. An accumulation of black gritty or oily flotsam in the coolant recovery bottle, a dire warning sign, should not be ignored, as it can be an indication of a head gasket or oil cooler leak. Lightly lubricating the cap’s larger gasket with a thin film of Teflon grease will improve the seal and prevent the cap from getting stuck.
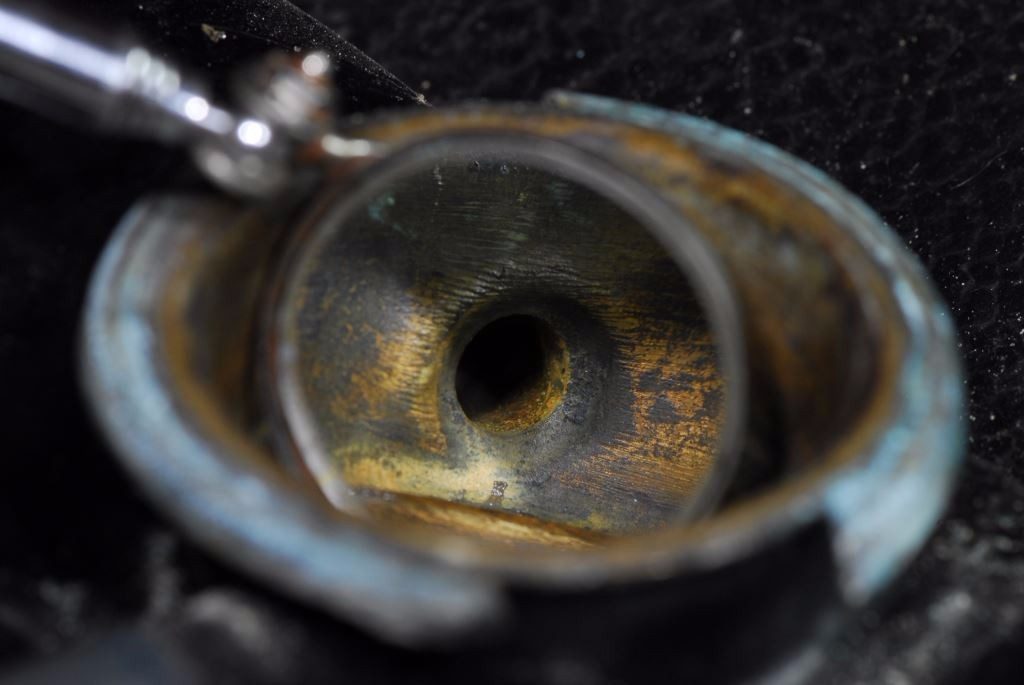
The port located in the expansion tank fill neck allows coolant to flow to the recovery bottle when the cap reaches its rated pressure. When the system cools and contracts, a vacuum is formed, drawing coolant back through this port and into the expansion tank. In order for this to work, the cap’s upper gasket must form an airtight seal, and thus it must be rubber or a soft gasket material.
Not all cooling system pressure caps are alike, most are designed to be used with a coolant recovery bottle; they rely on two rubber gaskets, a large one directly under the cap, and another smaller one located at the end of the spring, which also supports the check valve. Others, however, are not designed to create a vacuum and draw fluid back into the expansion tank when the engine cools off, they use one gasket, the smaller one, while the large one is absent, using a brass bushing instead (which is prone to cracking). Connecting a coolant recovery bottle to a system that uses the latter of the two caps isn’t harmful, however, it simply will not allow the bottle to work, coolant that flows into it will never return to the expansion tank, these caps are designed to be used without recovery bottles.
For systems not equipped with a recovery bottle, an air void is maintained at the top of the expansion tank when the engine is cold, into which coolant expands when the engine heats up. There’s no serious harm in this approach (for expansion tanks that are cast iron, the air void can allow rust to form within the tank), however, the user has no outward sign of the coolant level or consumption, the cap must be opened to check coolant level unless the expansion tank is equipped with a sight glass. If coolant is routinely moving into and back out of a recovery bottle with each heating cycle, there’s little doubt about the coolant level in the expansion tank. Having said that, the cap should be removed periodically, while the system is cool, to verify coolant level as well as inspecting the gaskets and check valve.
Because they must maintain an air void within when not used with a recovery bottle, steel and cast iron expansion tanks are prone to rusting.
Bottle Placement and Size
Coolant recovery bottle placement is frequently a source of confusion for boat builders, mechanics and boat owners. Because the bottle operates on the principles of pressure and vacuum, gravity plays little or no role in its proper operation. Therefore, contrary to popular belief, the bottle need not be placed above the engine. If it is, opening the pressure cap for inspection purposes virtually guarantees that coolant will run out of the bottle, and overflow from the expansion tank filler neck.
From the Cummins Marine engine installation manual, “The ideal position for the reservoir is above the expansion tank. Mounting the reservoir below the expansion tank, but above the crankshaft centerline, is acceptable. The reservoir should be mounted within 10 ft [3.5 m] of the expansion tank. The hose connecting the expansion tank to the reservoir must be leak free and not have kinks or sharp bends to ensure proper operation of the coolant recovery system.”
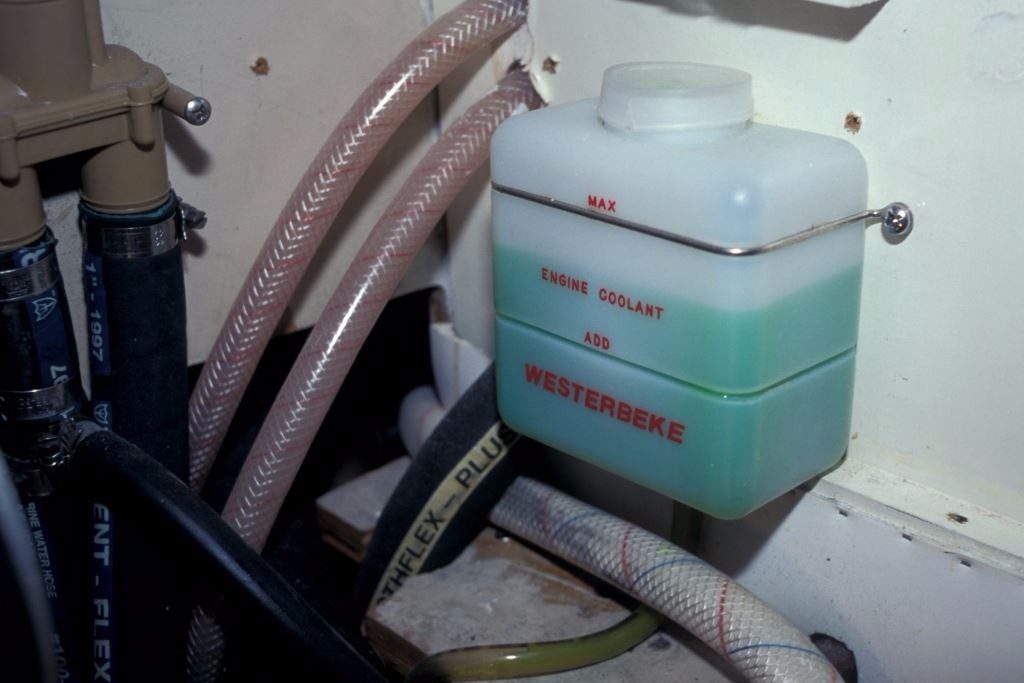
Ideally, the bottle should be placed so that the cold coolant fill mark is roughly level with the height of the pressure cap. The hose should be routed in such a way is to avoid blocking an engine room thoroughfare and prevent damage from chafe or being stepped on. Finally, while it is ubiquitous, clear PVC hose should not be used to connect the recovery bottle to the expansion tank. While the clear nature is attractive, this hose lacks the chafe, temperature, crush and kink resistance necessary for this vital application. Instead, a more rugged, coolant resistant hose such as Type B fuel line should be used.
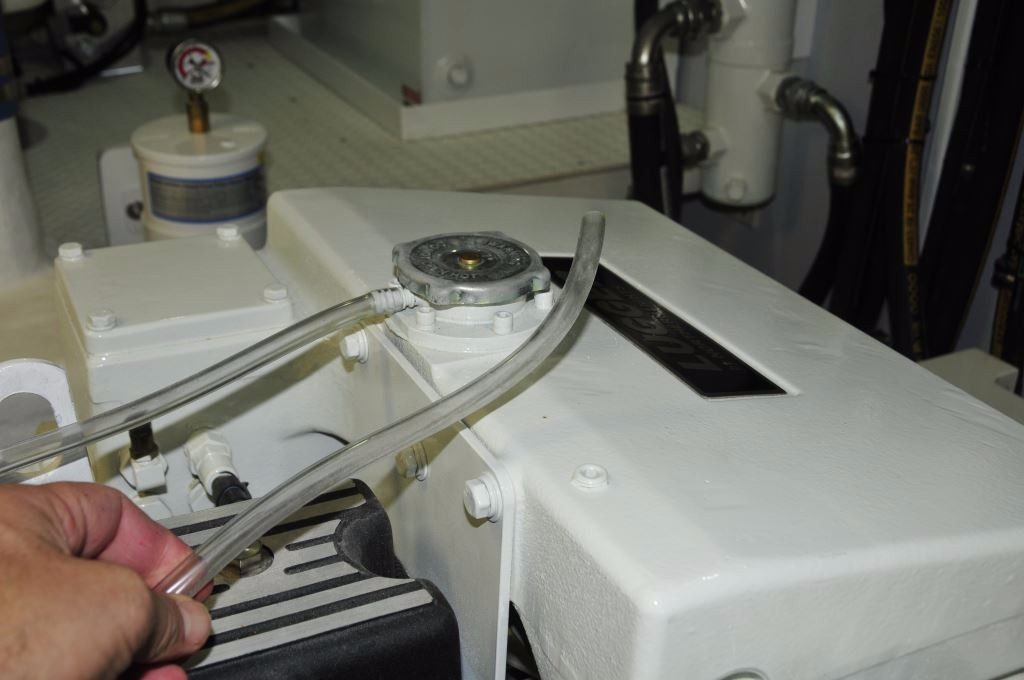
While it’s all too commonly used, clear PVC hose is not robust enough for coolant applications, it collapses, chafes and melts far too easily. Type B fuel hose makes for a far better choice.
Coolant recovery bottles are available in a wide array of shapes and sizes, from diminutive units designed for gensets (yes, they benefit from them too), and sail auxiliaries, to larger models are used with high volume systems. Volume is the operative word when sizing such bottles; as an undersized unit will overflow when the engine is hot, and register no coolant when cold. The more coolant the overall cooling system holds, the larger the bottle must be. In the absence of guidance from the engine manufacturer, and for keel-cooled systems, whose volume may be considerably larger than an equivalent heat exchanger, the 7% rule of thumb can be applied. This would mean, for example, a 40 liter system (I find it’s easier to convert measurements to liters for these calculations) would require roughly 3 liters of recovery, which can be rounded up to 4 liters, which in turn is roughly one gallon. It’s worth noting, a coolant recovery bottle can be retrofitted to virtually any pressurized closed cooling system provided the cap is designed to, or can be replaced with one that does, draw fluid from the bottle.
Your coolant recovery bottle is the window to your engine’s cooling system, make sure yours is properly installed and in good working order; it may very well alert you to problems long before they otherwise manifest themselves.

